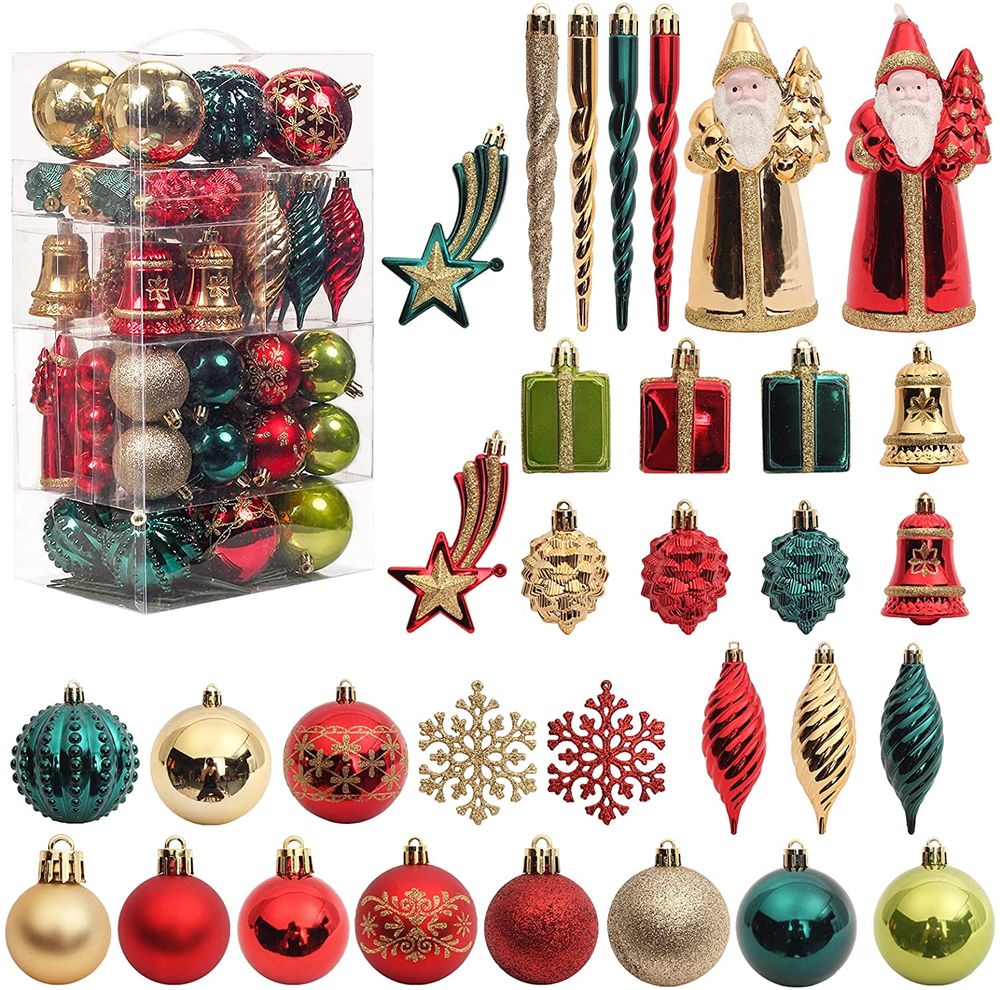
Christmas ornaments are indispensable to the most festive season of the year. It all comes down to the right colors and materials. And no one wants to stress out decorating their tree or mantle with cheap, tacky ornaments.
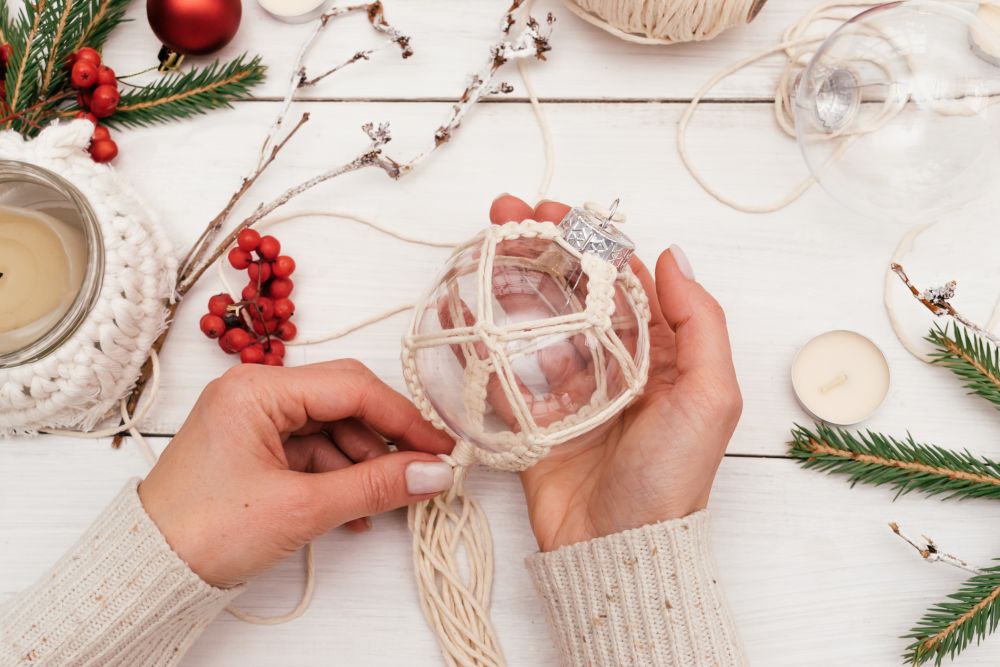
You can take the DIY route if you want to spruce up your Christmas decorations this year since handmade ornaments bring something special to the table. Besides, it’s a wonderful occasion to spend time with your family and teach your kids all about crafting.
If you’re curious about what you’re going to see below and want a quicker way to access it, tap these links:
55 Christmas Ornaments You’ll Love
We created a list with the top Christmas ornament ideas for 2021, so check it out!
DIY Christmas Ornaments
Let’s see some really cool Christmas ornaments you can make yourself as a project this year!
1. Painted Glass Christmas Ornaments

If you want to create a beautiful Christmas ornament that will look lovely on the tree, painting glass orbs is one of the best ways to go. It’s a good idea to personalize your landscape and create your style instead of following the usual trends.
When it comes to materials, you need a glass ball, acrylic paint in the colors of your choice, and a paintbrush! If you want to hang several balls from a string, you can do that too!
The hardest part is painting the glass ball itself. We recommend starting with a white background and adding a second layer of color, but you can experiment in any way you want! Children might love to paint their own Christmas ornaments with a little help from a grown-up.
If you want to learn about painting glass Christmas ornaments, go to our detailed tutorial. It has everything you need to know about making them as part of your holiday décor.
2. Footprint – Baby’s First Christmas Ornament

If you’re expecting a little one this year, this project is the perfect way to mark their first Christmas: imprinting your baby’s footprints on a Christmas ornament to hang on the tree. It’s a great keepsake that you can cherish for years to come, and it’s special because it involves your entire family.
This is a wonderful project to do with the little ones in your family because it’s simple and fun! To make your baby’s first Christmas ornament, you need only three items: tacky glue, glitter, and a standard Christmas bulb ornament.
Once you’ve assembled the materials, it’s time to get started. Place your baby’s foot on a piece of paper and draw its outline. Then, cut it out of the paper and trace it to the bulb ornament.
Now, all that’s left is filling the outline with tacky glue and covering it with glitter. Make sure to remove any excess glitter, and then wait for a day until it dries off. It might be a good idea to add a hanging tag so that it doesn’t get mixed with other ornaments in the future!
We discovered this wonderful idea at Not Quite Susie, so be sure to check it out!
3. Paper Roses – Custom Christmas Ornaments
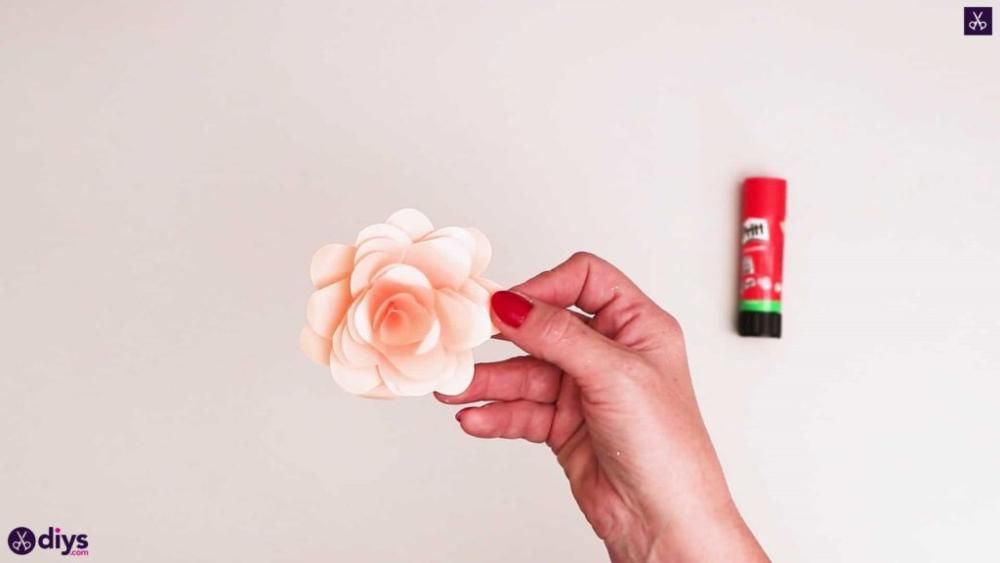
For custom Christmas ornaments, try crafting beautiful paper roses with a string! It’s a great way to get the kids busy during the holidays, so you can print this idea for them to follow when making these items!
There’s nothing complicated about this do-it-yourself project, which means that everyone in your family can enjoy creating these lovely ornaments. In fact, you can hold a friendly competition to see who designs the most beautiful roses.
As far as materials are concerned, you need colored paper, a pencil, a glue stick, a pair of scissors, a ruler, and twine or string. Start by measuring the size of the finished rose and use a ruler to draw its shape on a sheet of paper. Then, cut around the shape.
Make a middle piece for the rose out of contrasting paper, which you have to glue on top of the first layer. For long petals, cut one more sheet of paper and glue it on top of the previous layers.
Flatten each petal with your hand so that they stand straight up once dry. Then you have to punch a hole in the middle of the flower to add a string or twine for hanging it on your Christmas tree.
To learn more about making paper roses, follow our tutorial!
4. Nightmare Before Christmas Ornaments
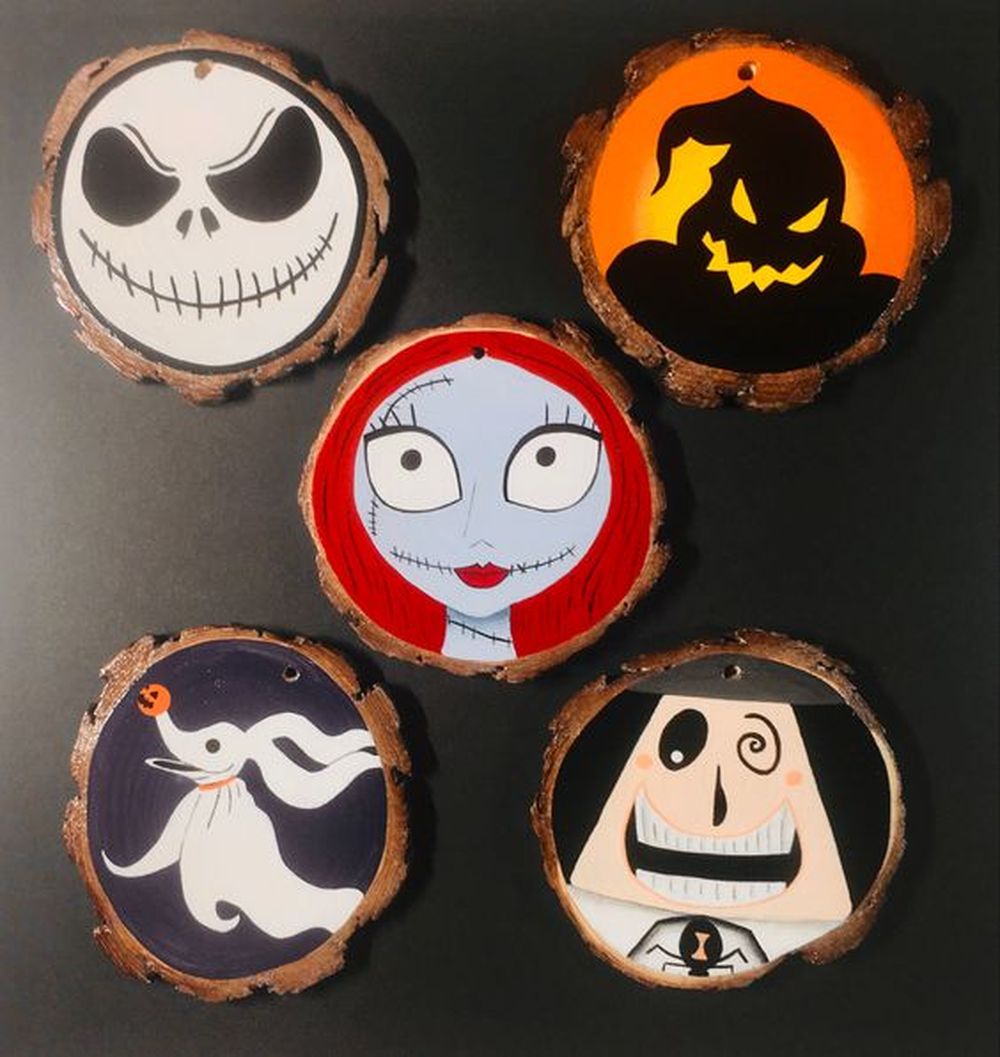
The Nightmare Before Christmas is a beloved animated motion picture that tells a story of a world called Christmas Town, where characters and creatures from children’s stories exist. It’s no wonder that a lot of kids want to see Nightmare Before Christmas ornaments on their trees.
So, if you’re looking for a simple idea to make their wishes come true, try your hand at painting characters from Nightmare Before Christmas on wooden slices.
You first have to draw the characters on the slices and then paint them with acrylic paint. Avoid purchasing acrylic paint that is metallic. It’s also a good idea to color the adhesive cord used for hanging the ornaments by painting it green.
Just think about how much fun your kids will have making these mini decorations! No doubt that they’ll be thrilled if you pick up a few extra bags of wooden slices so each of them can craft their own Jack.
For more inspiration about making Nightmare Before Christmas ornaments, check out this Pinterest post, which was uploaded by Julie Bense Smith!
5. Marble Paint Glass Christmas Ornaments
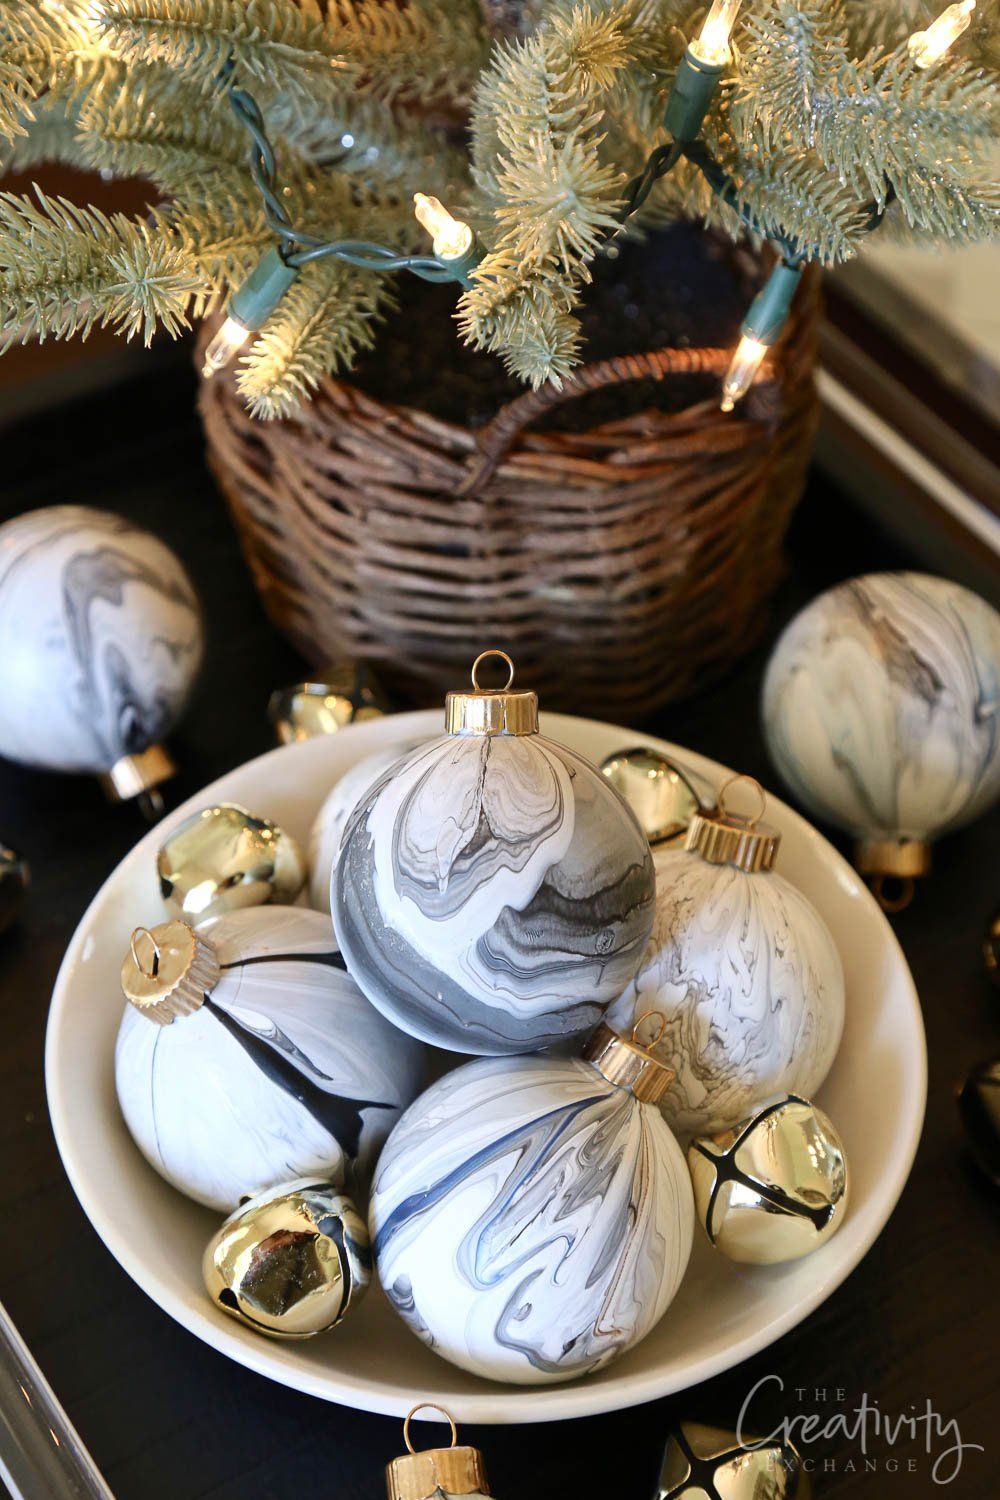
If you’re interested in an interesting glass Christmas ornament idea that you can make on your home at home, check out this stunning project that involves marble paint. It’s artsy but doesn’t require any special painting skills, so you will be able to create fabulous decorations to hang on your Christmas tree and have your guests admire.
Marble paint pour crafts are all the rage right now, and there’s no reason not to get in on the fun! Besides, these DIY Christmas ornaments offer a good chance for your kids to get creative and experiment with different colors, patterns, and textures.
When it comes to materials, you need Testors Craft Acrylic Paints, Testors Craft Marbling Medium, clear glass or plastic ornament balls, a newspaper or poster board, plastic kitchen wrap, a styrofoam block, wood kitchen skewers, wood dowels, and small dixie cups.
Be sure to protect your workspace with the newspaper or poster board. Then you can start by wrapping the styrofoam block with kitchen plastic wrap. Insert one end of the wood dowels in the ornament balls and the other end in the styrofoam block so that the balls sit up straight without touching each other.
In the following step, you can prepare the painting mixture after pouring equal parts of the medium and paint in a dixie cup. Keep in mind that you need a dixie cup for each mixture of one painting color. Afterward, you can combine everything to get the final look of your marble paint.
Now you just have to pour the paint over the ornament balls until they are completely covered. Let the paint dry, remove the wood skewers, reattach the hanging clips of the ornaments, and hang them on your Christmas tree.
To find out more about making marble paint glass Christmas ornaments, head over to The Creativity Exchange! You can also watch a video tutorial.
6. Handprint – Baby’s First Christmas Ornament
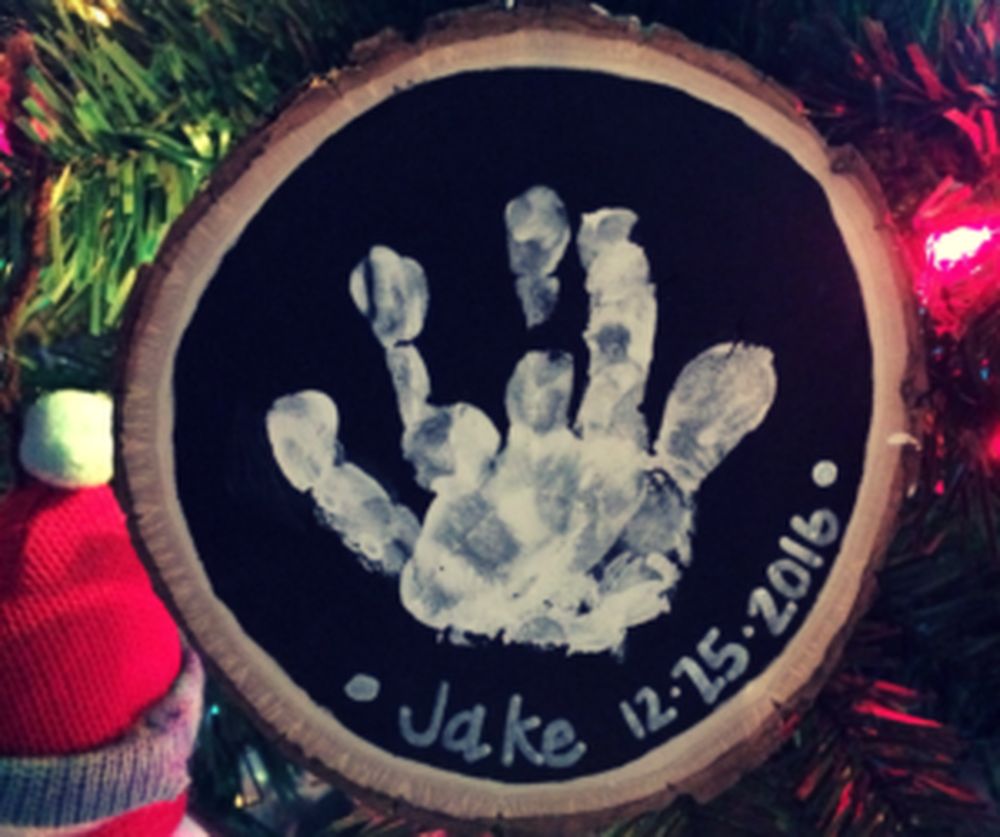
Another excellent DIY Christmas ornament idea is to create a special decoration for your baby’s first Christmas using their handprint. It doesn’t require much effort but will leave an everlasting impression no matter how old your toddler gets!
If you want to try out this option for the baby’s first Christmas ornament, gather the following supplies: a wood slice, white acrylic paint, black chalkboard paint, a white Sharpie paint pen, a pencil, paintbrushes, and a small hook.
Start by drawing a circle on the wood slice while making sure to leave a bit of room on the edges. Next, you can paint the circle with black chalkboard paint and let it dry off completely. Next, cover your baby’s palm in white paint and press it against the wooden slice. Of course, it doesn’t have to be perfect.
Once it dries off, you can write the baby’s name and current date below the handprint using the paint marker. Or, you can write anything else. As you can see, the steps are pretty elementary, so don’t be afraid to experiment with this stunning DIY Christmas ornament idea!
For more details, head over to Smart Cents Mom!
7. Gold Leaf Christmas Tree Ornaments
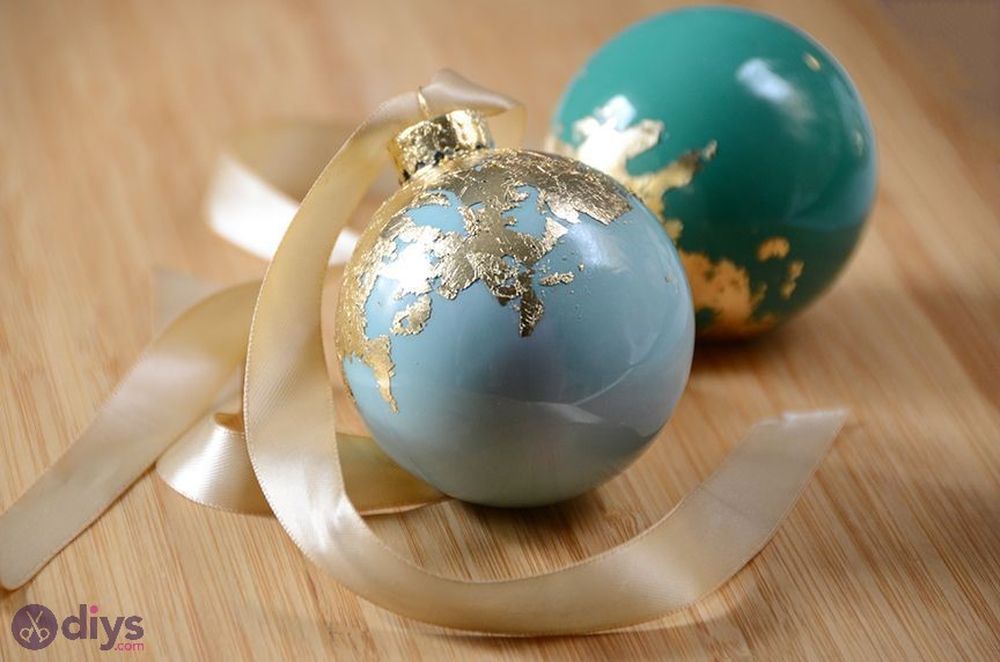
You can adorn your Christmas tree with the most exquisite decorations you can think of, even if it means taking some time off to create these one-of-a-kind ornaments. We recommend making each Christmas tree ornament by hand.
But if you don’t have enough time for this endeavor, you can enlist the help of family and friends. Check out this stunning gold leaf Christmas tree ornament!
To prepare a bunch of these, you will need Speedball Mona Lisa Gold Leaf Kit, clear glass ornaments, acrylic craft paints, assorted paintbrushes and foam brushes, gold ribbons, and plastic cups.
Start by mixing the paints in a plastic cup, and don’t be afraid to mix different colors to obtain something new and exciting. Then, remove the metal cap from the ornament and carefully pour the paint through the small hole. Next, shake the ornament until the paint covers it entirely on the inside.
Eliminate the excess paint and wait for the paint inside to dry off. During this time, you can prepare the metal caps by adding a coat of adhesive. Also, apply the adhesive to the outer layer of the glass ornaments.
Set the items aside until the adhesive feels tacky, and then you can apply the gold leaf kit over the ornament. Finally, you can add a gold ribbon to each ornament so that you can hang it on your Christmas tree. The results are gorgeous!
Read our in-depth guide to learn more about making gold leaf Christmas tree ornaments!
8. DIY Macrame Christmas Ornaments
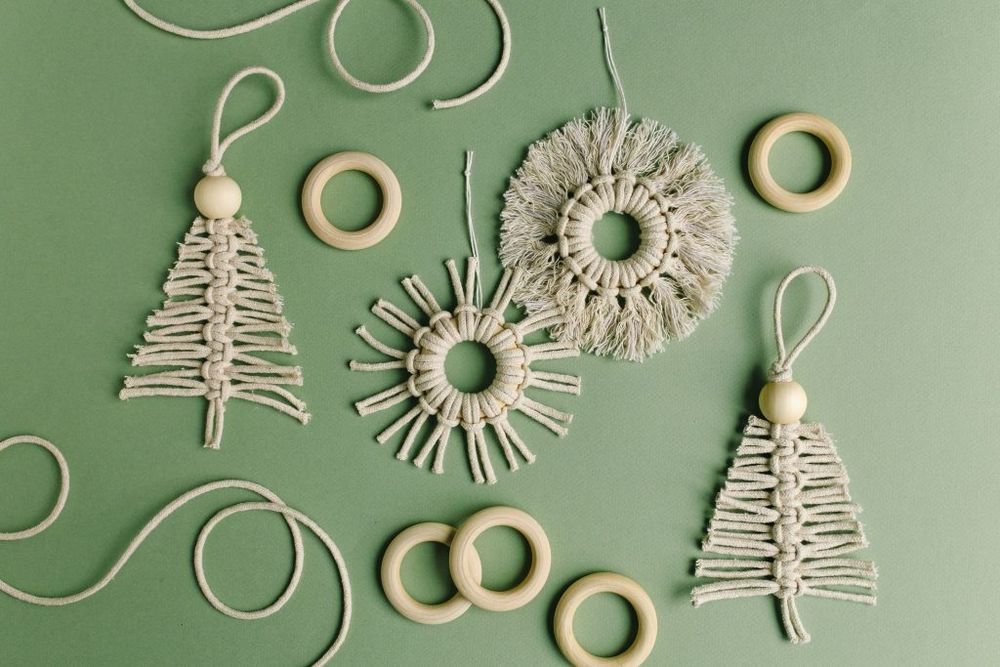
If you’re seeking easy Christmas ornament ideas, we suggest making various shapes out of a macrame cord. It’s one of the simplest and most creative ways to decorate your Christmas tree in a stylish way, without spending too much time in the process.
This original and highly creative decorating solution is also inexpensive, which makes it even more appealing. DIY macrame ornaments are perfect for kids because they will have no problems following instructions. When it comes to materials, you need a macrame cord, wood beads, wood rings, scissors, and white twine.
Learn everything about this fabulous idea and check out the full instructions at Pretty Life Girls!
9. Recycle a CD – DIY Christmas Ornament
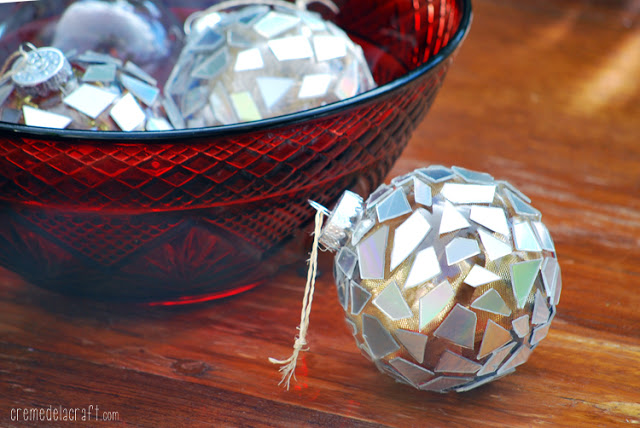
You’ll need some old CDs (preferably blank ones) to create these beautiful ornaments from Creme de la Craft. Grab some plain, glass ornaments and give them a go!
10. Hot Air Balloon – DIY Christmas Ornament
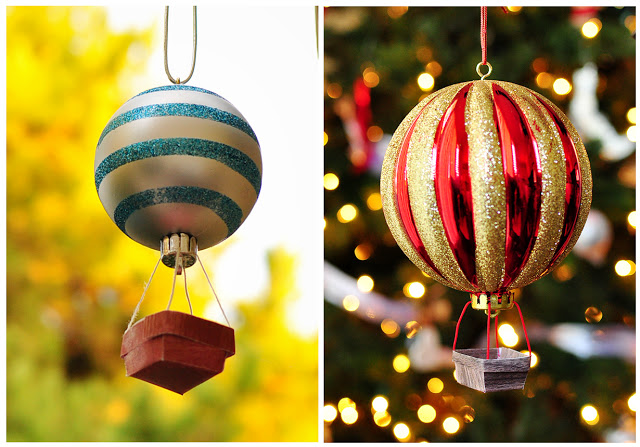
The Cheese Thief has a detailed tutorial on how to make your very own hot air balloon right at home and then use it to create a bright spot on the family tree with. We love this idea and love its creativity!
11. Glitter Pine Cones – Christmas Ornament
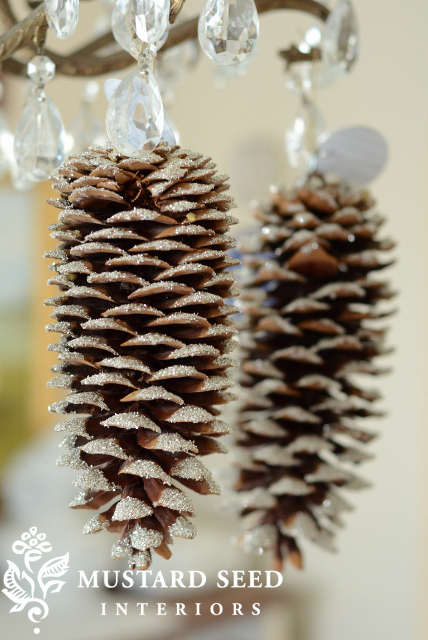
Create these gorgeous sparkle snow-covered pine cones to adorn your tree or even your chandelier for the holidays season. Get the details and directions at Miss Mustard Seed!
12. Button Balls – DIY Christmas Ornaments
All Things Andrea used some vintage buttons and put them to good use making these charming button balls for the tree. You can even take them and make small wreaths out of the crafty pieces, check out how after the jump!
13. Knitted Mittens – Unique Christmas Ornament
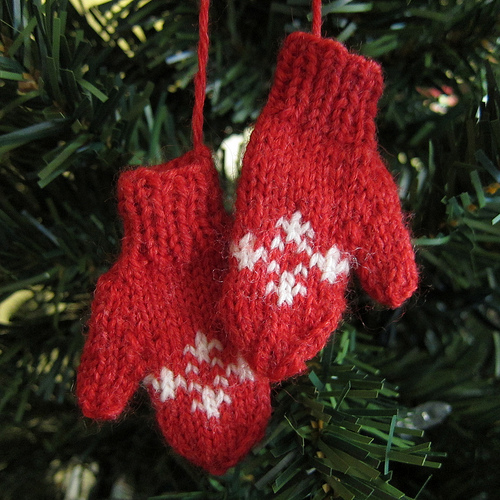
These tiny mittens would be such a cute addition to any of your home’s Christmas trees – because let’s face it, we all have more than one by now right? Learn how to knit these cuties over at Just Crafty Enough.
14. Bell Jar Unique Christmas Ornament
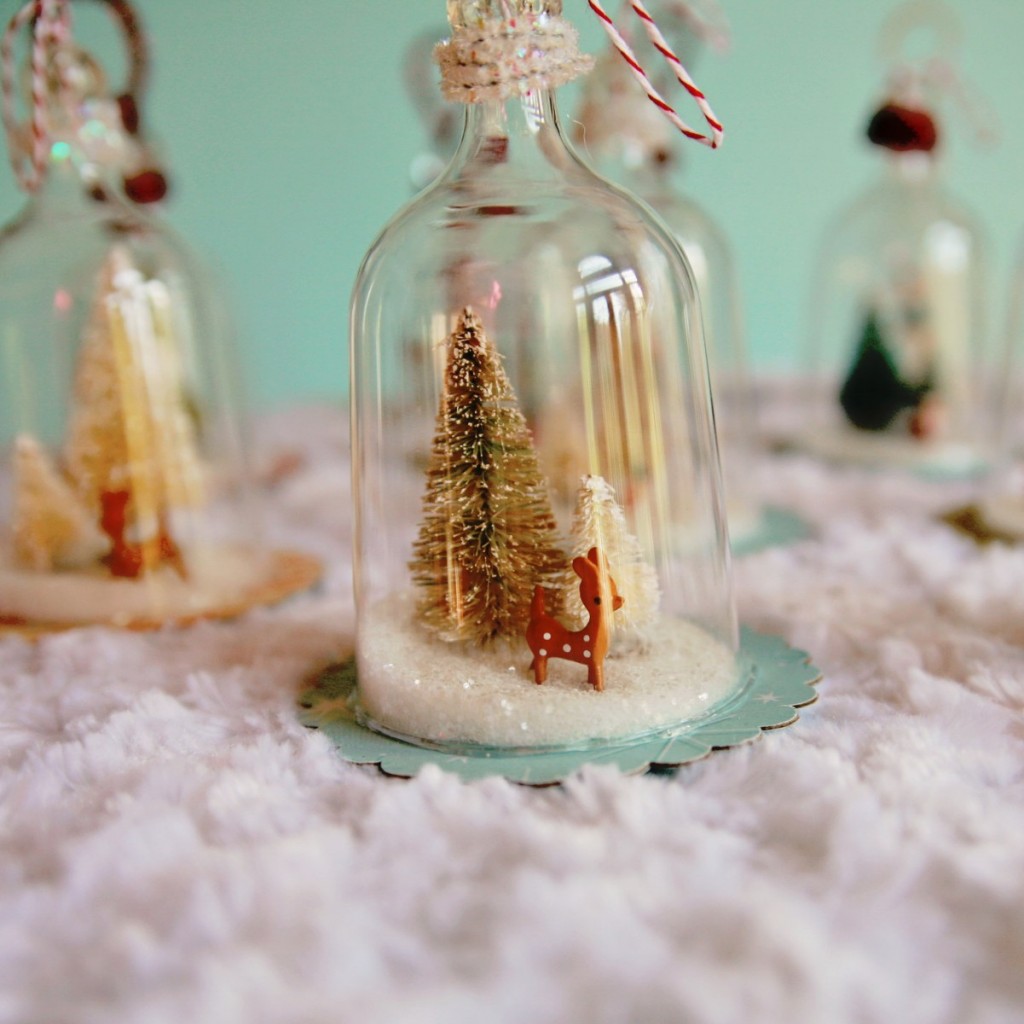
Are these vintage bell jar ornaments not gorgeous? My So Called Crafty Life made these beauties and then gave us all the tools and information on how to make them ourselves!
15. Baroque Pearl Christmas Ornament
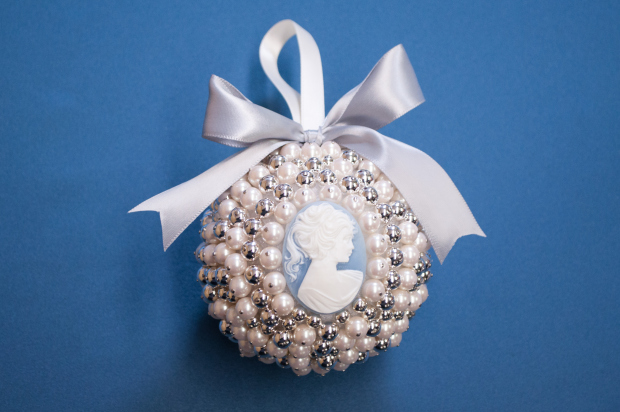
M&J shows us how to recreate these stunning ornaments for our Victorian-inspired Christmas. Follow the tutorial and add your own creative twist on the design.
16. Ombre Paint Christmas Ornament
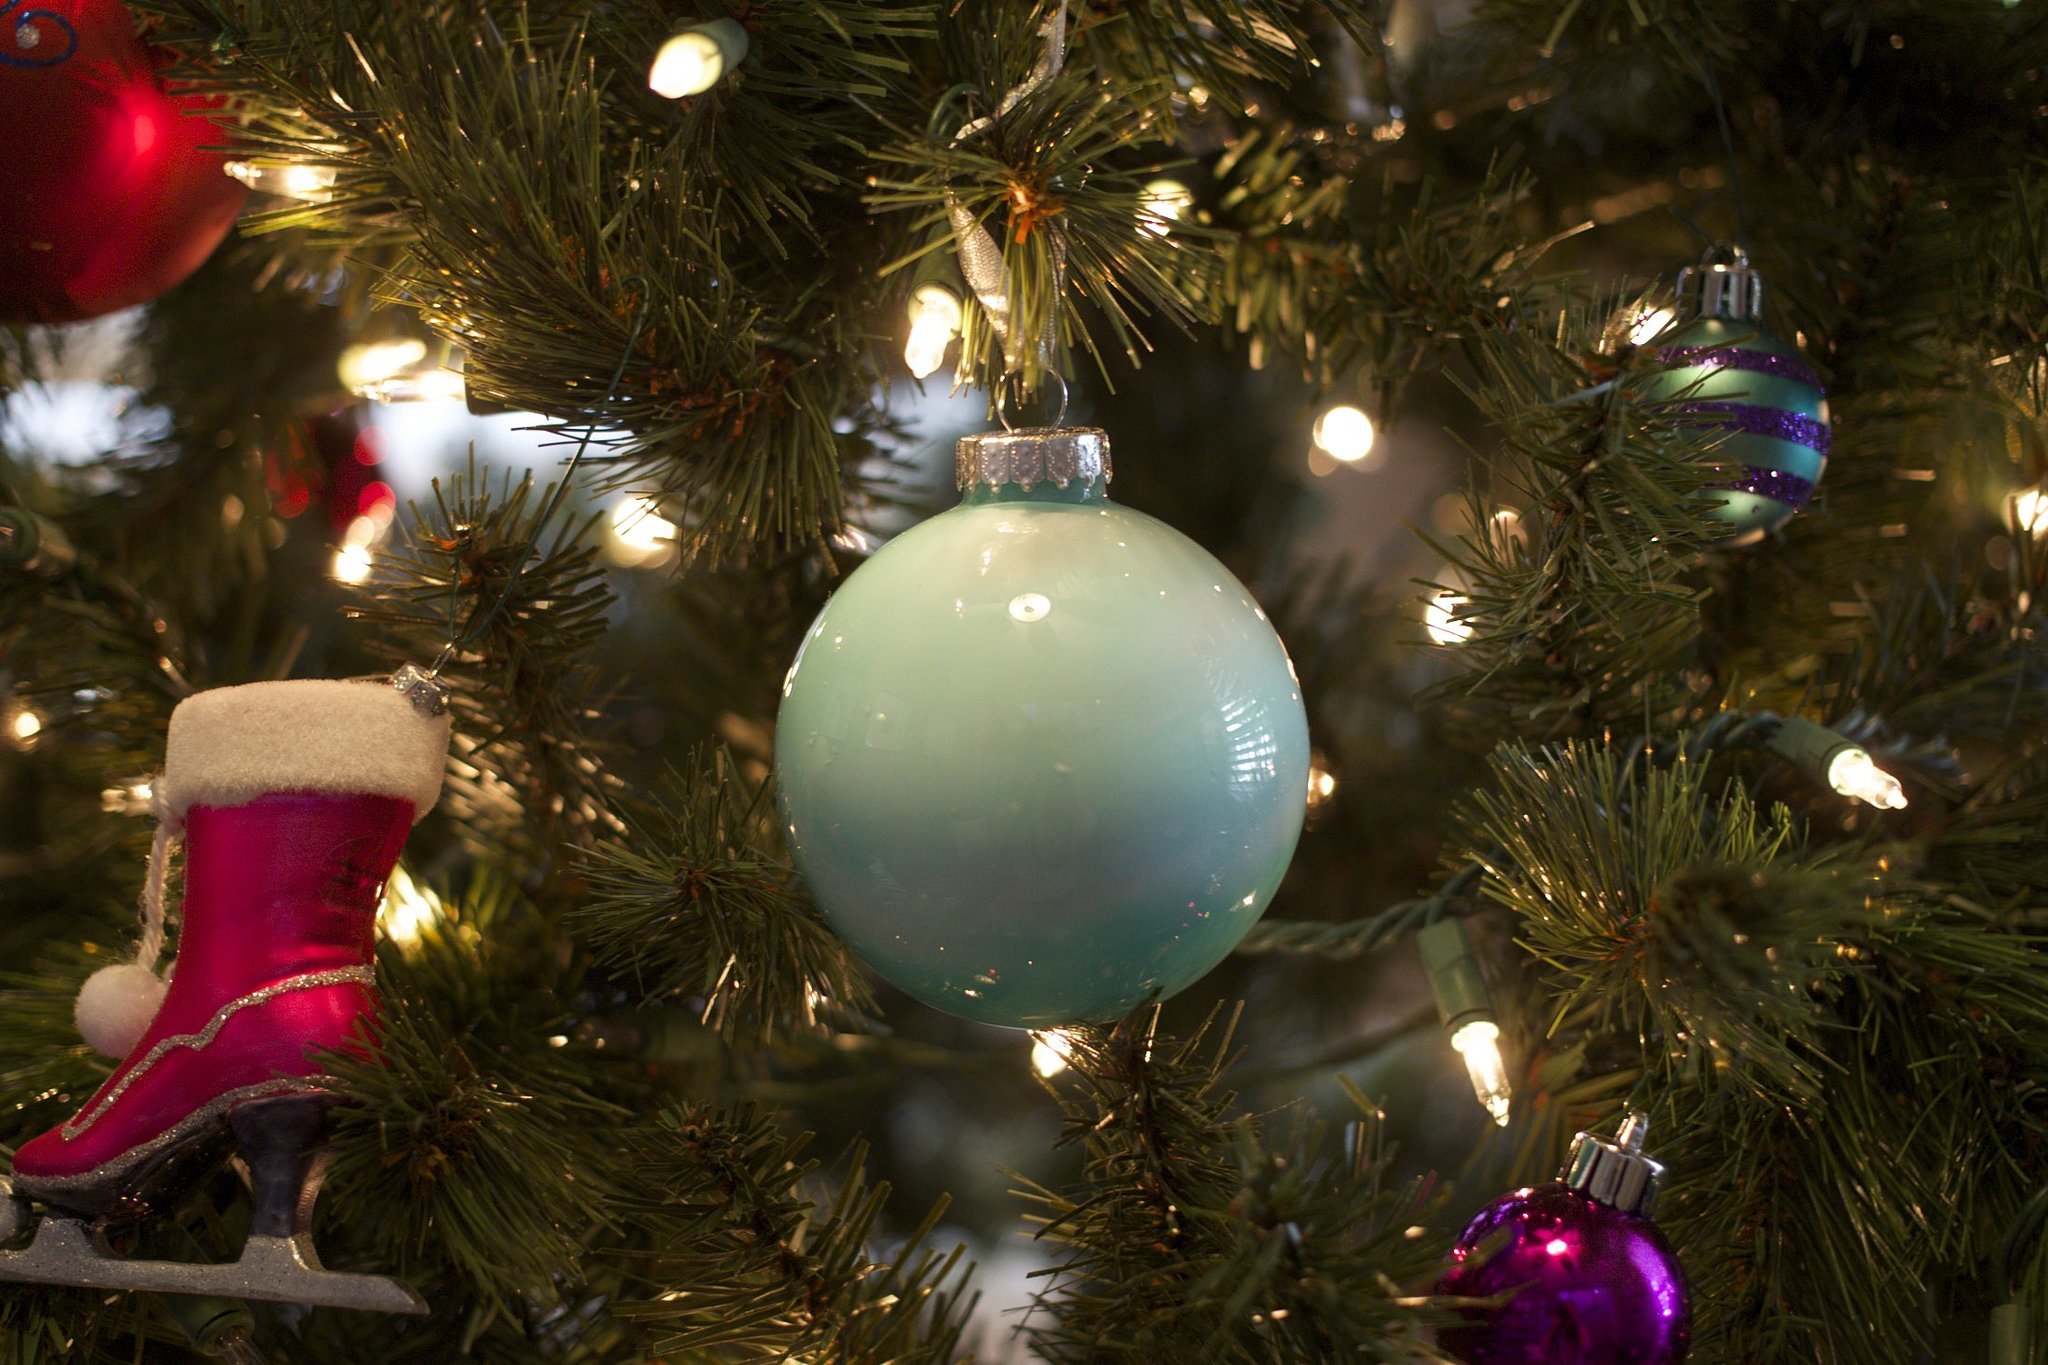
We love all things ombre, and that includes on our Christmas ornaments. Learn how to make some of these classic balls with a modern style at Popsugar.
17. Necklace Christmas Ornament
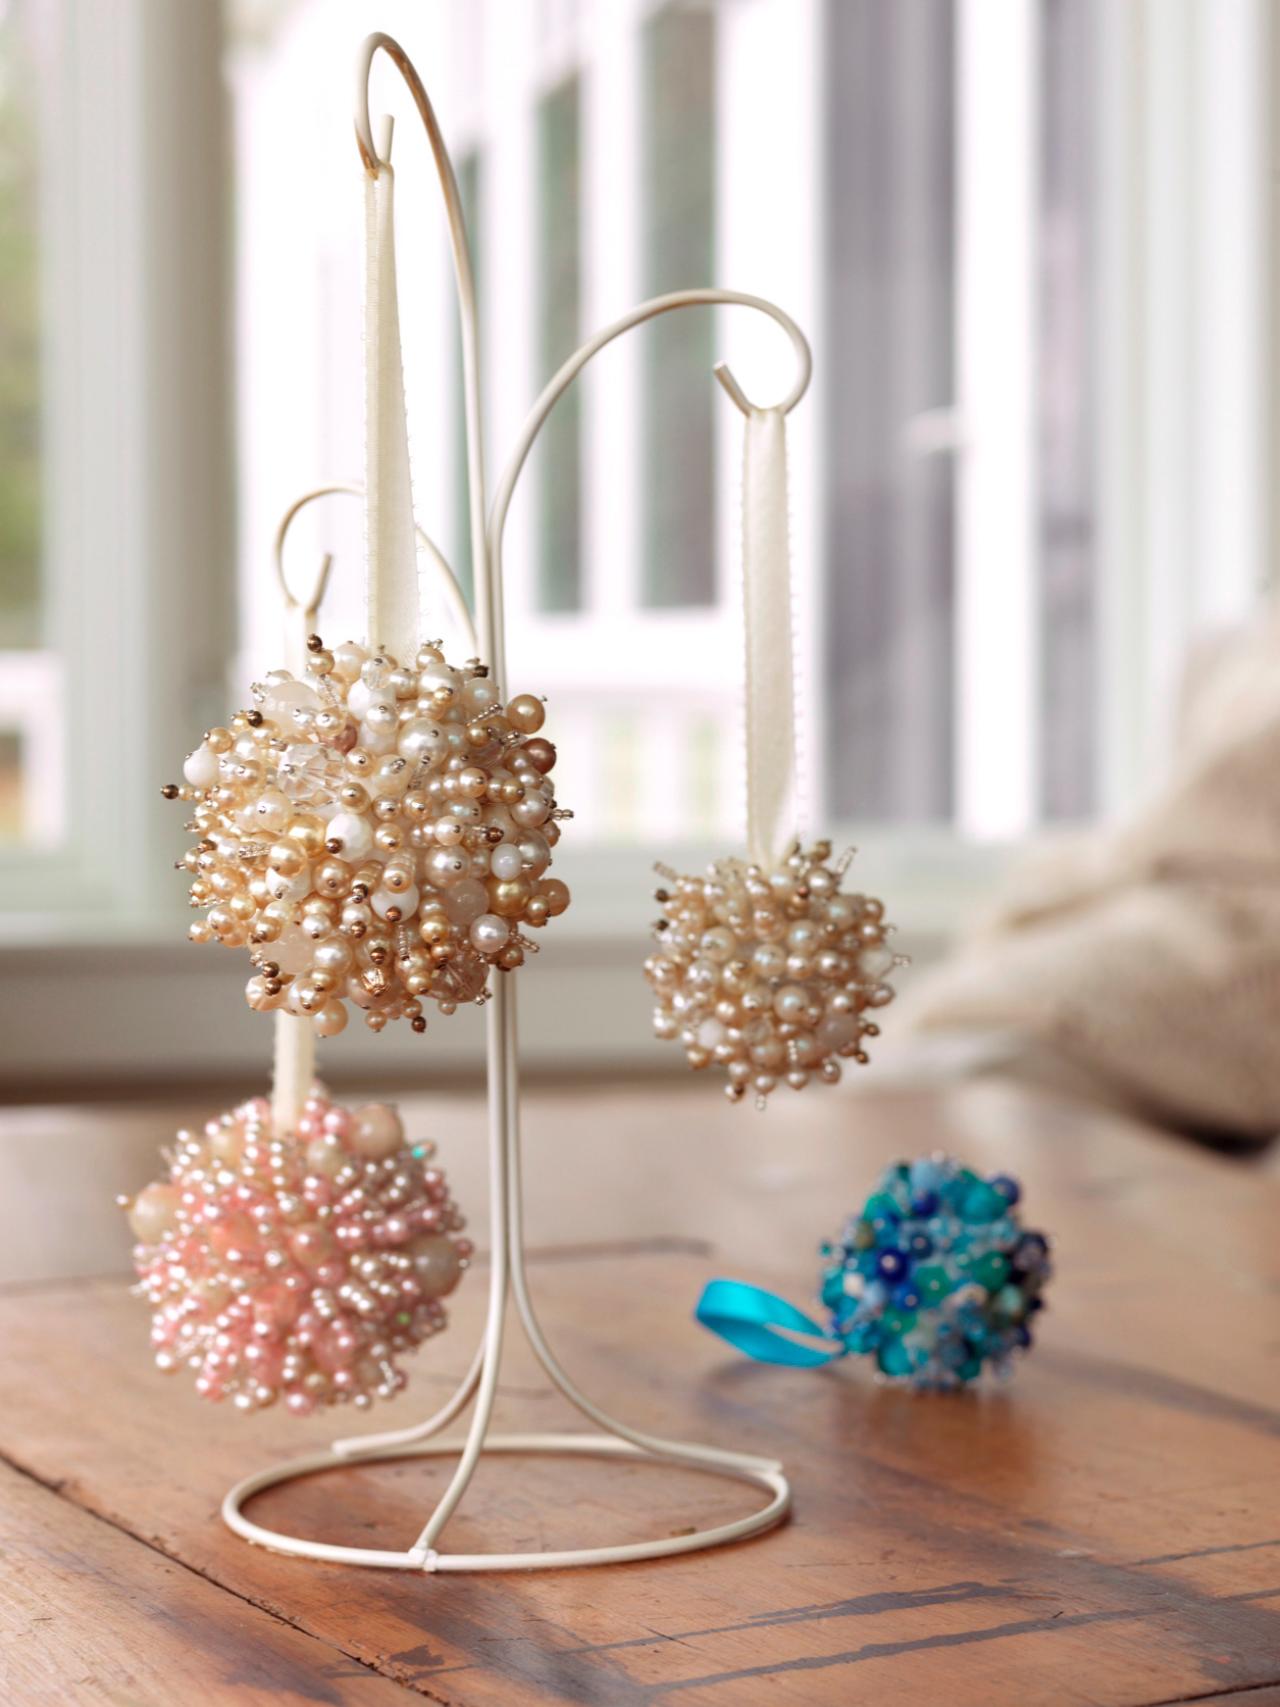
Use some of your old necklaces, deconstruct them and create Christmas ornaments out of them. With inspiration from DIY Network you’ll have some gorgeous new additions to the tree.
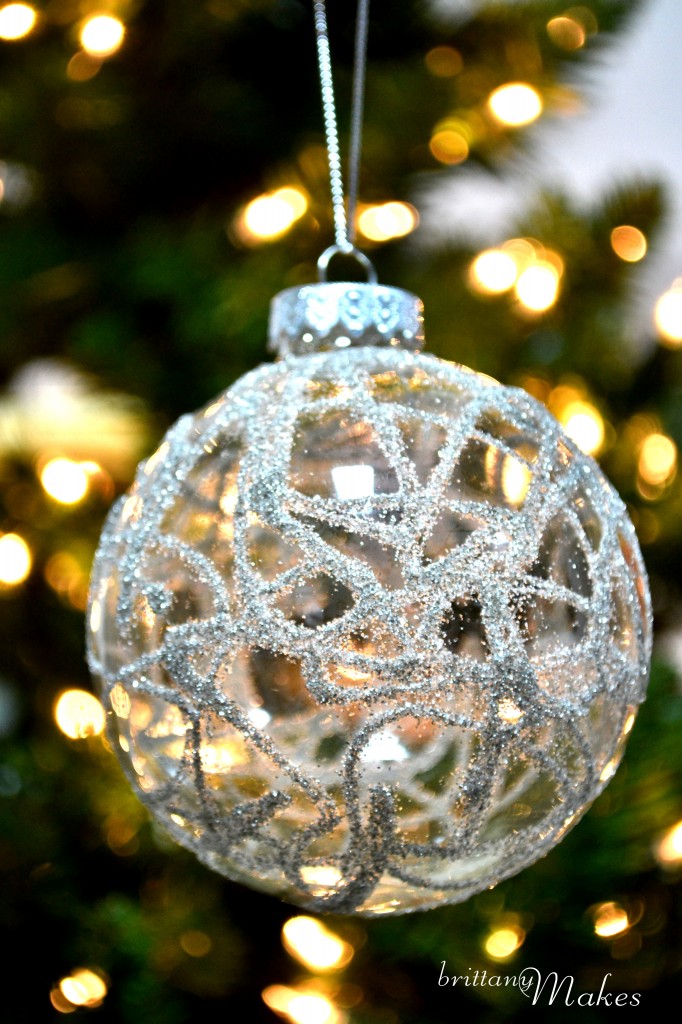
18. Glitter Design Christmas Ornament
Check out these gorgeous, glittering ornaments made by Brittany Makes. Walk through the process and learn how to make your own art decor-inspired pieces.
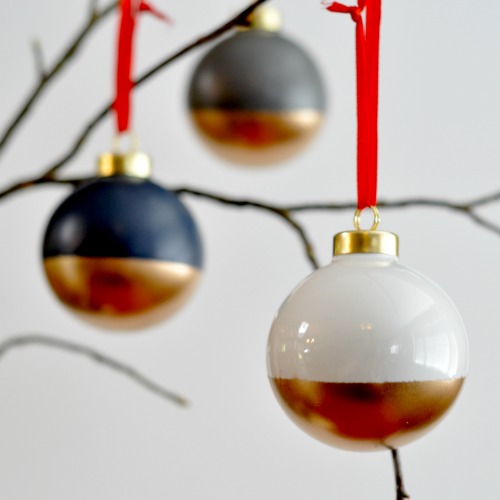
19. Gold-Dipped DIY Christmas Ornament
Sometimes the best projects are the simplest. Suburble made these chic and sophisticated ornaments that I’ll be making for my own tree this season!
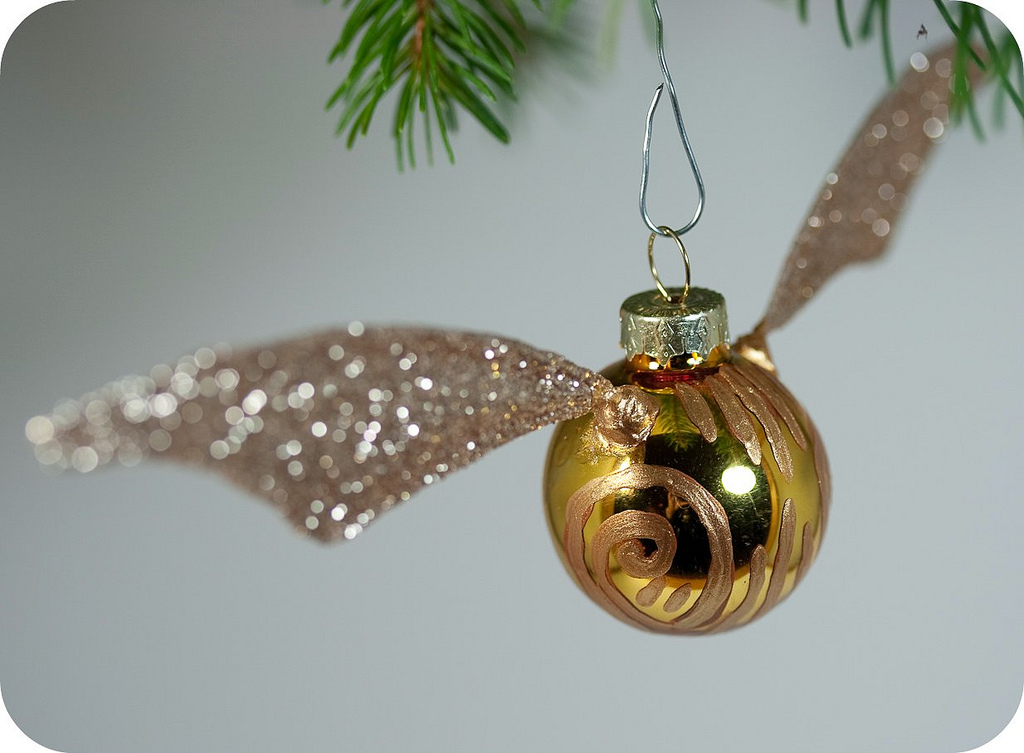
20. Golden Snitch Christmas Ornament
Who is a fan of Harry Potter? If you fall under that category, then you’ll need to create this golden snitch ornaments like they did over at Tiny Apartment Crafts!
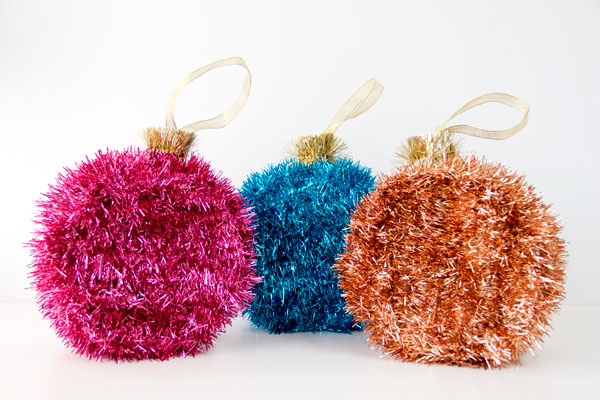
21. Fuzzy DIY Christmas Ornaments
Here’s another personal favorite project on the list. From Studio DIY, these pinatas ornaments are funky, festive and totally fashion-forward, helping your tree become the envy of the neighborhood.
22. Sundaes – Custom Christmas Ornaments
Run! Miss Nelson’s Got The Camera made these adorable, and stunning, sundae ornaments that seem like such fun to DIY at home. Sprinkles, and a pom-pom topper – the kids would love to get involved with this one.
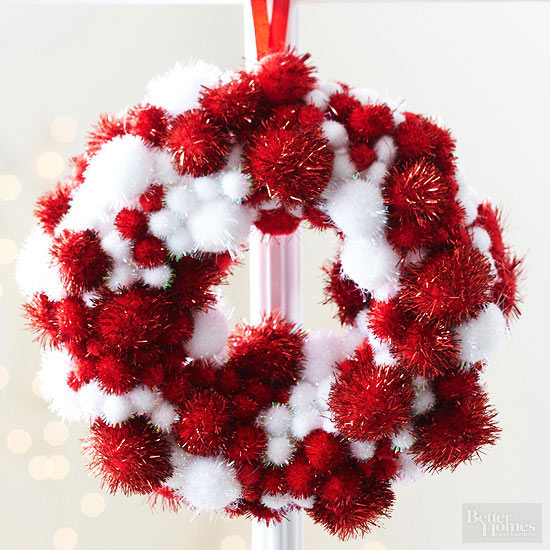
23. Mini Pom-Pom Wreath DIY Christmas Ornament
Personally, I love this mini pom-pom wreath from BHG. You can mix the colors to match your home’s Christmas decor or go classic like with this red and white one!
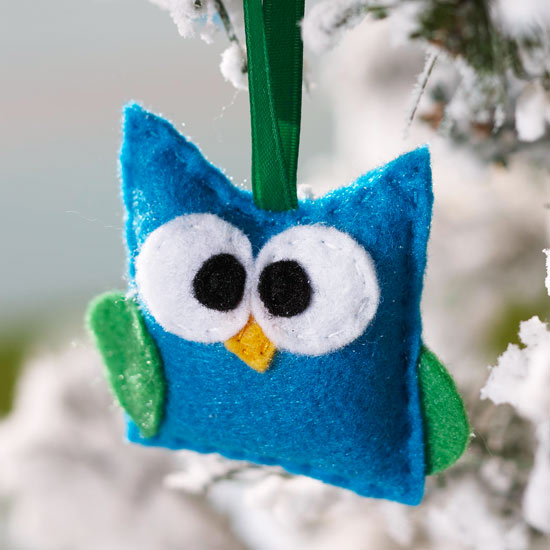
24. Felt Owls DIY Christmas Ornament
BHG always has great ideas and this little felt owl would be such a cute addition to your tree this year. Check out the details and put your sewing skill to the test.
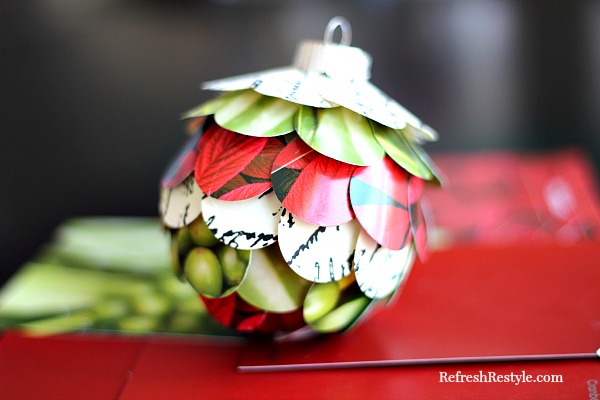
25. Paint Chips Christmas Ornament
We love this textured design and you can learn how to make it – quite easily – over at Refresh Restyle. Mix up the colors and prints if you’d like a more personalize finished product – don’t be scared!
26. Paper-Stuffed Christmas Ornaments
Take some of your favorite paper – colored, printed, textured or here even sheet music – and stuff some ornaments with it! BHG gives you all the details and inspiration!
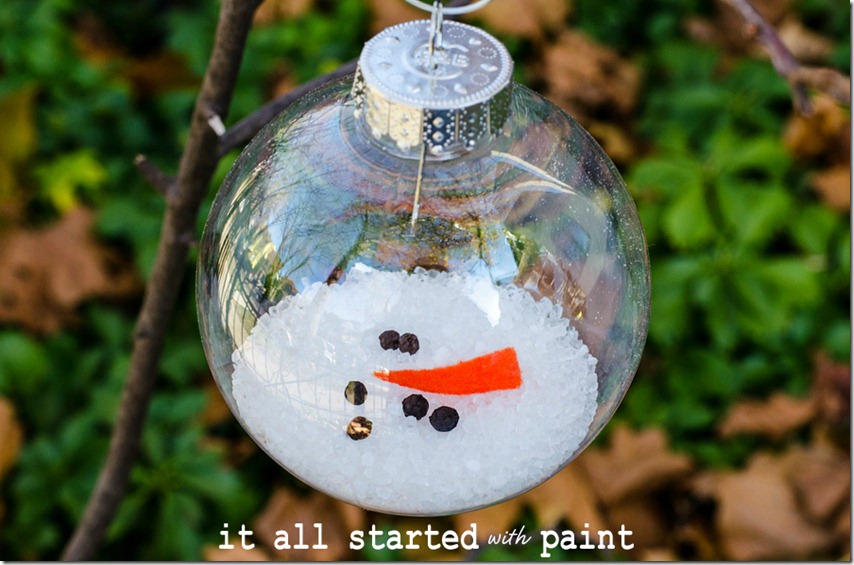
27. Melted Snowman Custom Christmas Ornaments
It All Started With Paint teaches us how to make these charming, melted snowmen ornaments for our tree. Create new faces on each piece and personalize them with names!
28. Computer Pieces DIY Christmas Ornaments
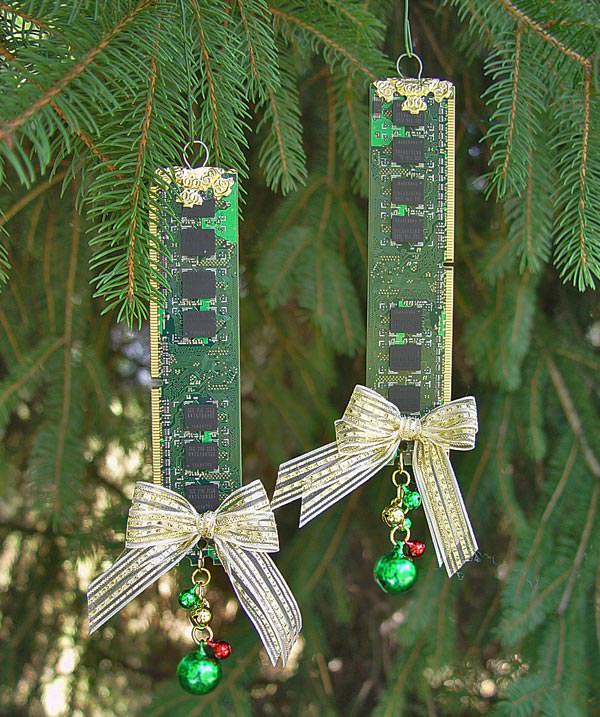
Recyart shows us how to use old pieces of a computer and turn them into beautiful pieces of Christmas tree decor. This is such a great way to reuse and recycle, don’t you think?
DIY Christmas Ornaments for Kids
How about some ornaments you can make with the kids as a cute project? Well, we have plenty of these too!
29. Paper Stars – Personalized Christmas Ornaments
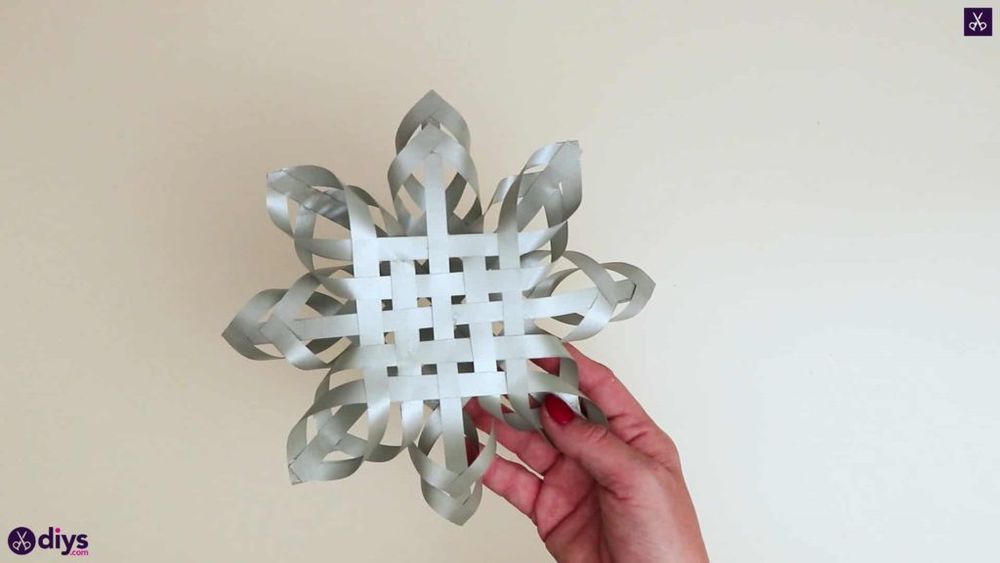
You can use paper to make personalized Christmas ornaments these days. Paper stars are one of the best projects to get you started, and there are so many other ideas to try.
We like this one because it’s different than other paper star projects we’ve seen. It involves cutting strips of paper and then weaving them to create beautiful ornaments that you would be proud to hang on your Christmas tree.
When choosing paper, you can use wrapping paper or any other kind of decorative paper that appeals to your style. It’s a great activity to do as a family, and you could help your child make their own paper star ornament.
Plus, you can hang the star on your tree in any way you want: tack it onto a branch, or hang it from the top, depending on what you prefer.
If you want to learn how to make paper star ornaments for the Christmas tree, we share a wonderful tutorial. Start crafting today and enjoy the results!
30. Pom-Pom Angel – Christmas Tree Ornaments
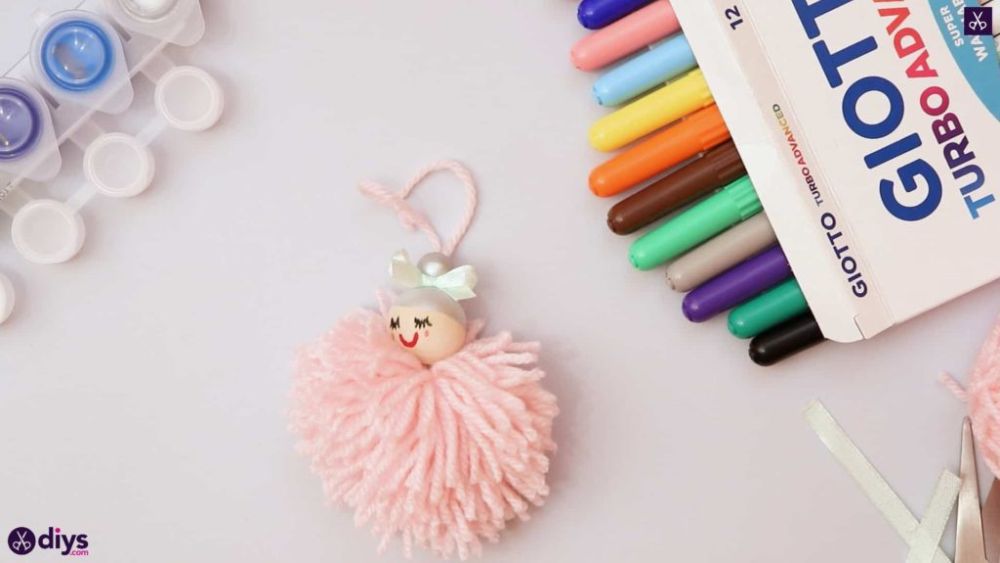
If you’re looking for a cute and unusual Christmas tree ornament, you can try crafting a pom-pom angel. It’s one of the easiest ornaments that your kids can make. This way, you can keep them busy while you’re busy preparing dinner.
The best part is that this craft appeals to both kids and adults! No matter your age, you can enjoy creating this pom-pom angel. It only takes a few minutes to put together once you know the instructions.
The first step is to gather materials. For each angel, you need a big and a small wooden bead, a paintbrush, silver paint, pink yarn, a pair of scissors, a white ribbon, and markers in various colors (black, red, pink).
Start by painting the large wooden bead silver to make it the angel’s head and the small wooden bead to turn it into the angel’s bun. Then you have to make a large pom-pom using the pink yarn and add it to the bun.
In the following steps, draw the angel’s facial expressions with the markers and, finally, make a hair ribbon out of the white ribbon. And that’s it! You can now hang the adorable ornament on your Christmas tree. We bet that your kids will feel special for helping you out with holiday decorations this year.
Check out our tutorial to get the complete instructions on making a pom-pom angel for the Christmas tree! You can also watch a video tutorial.
31. Geometric Hand-Stitched Wooden Slice DIY Christmas Ornaments
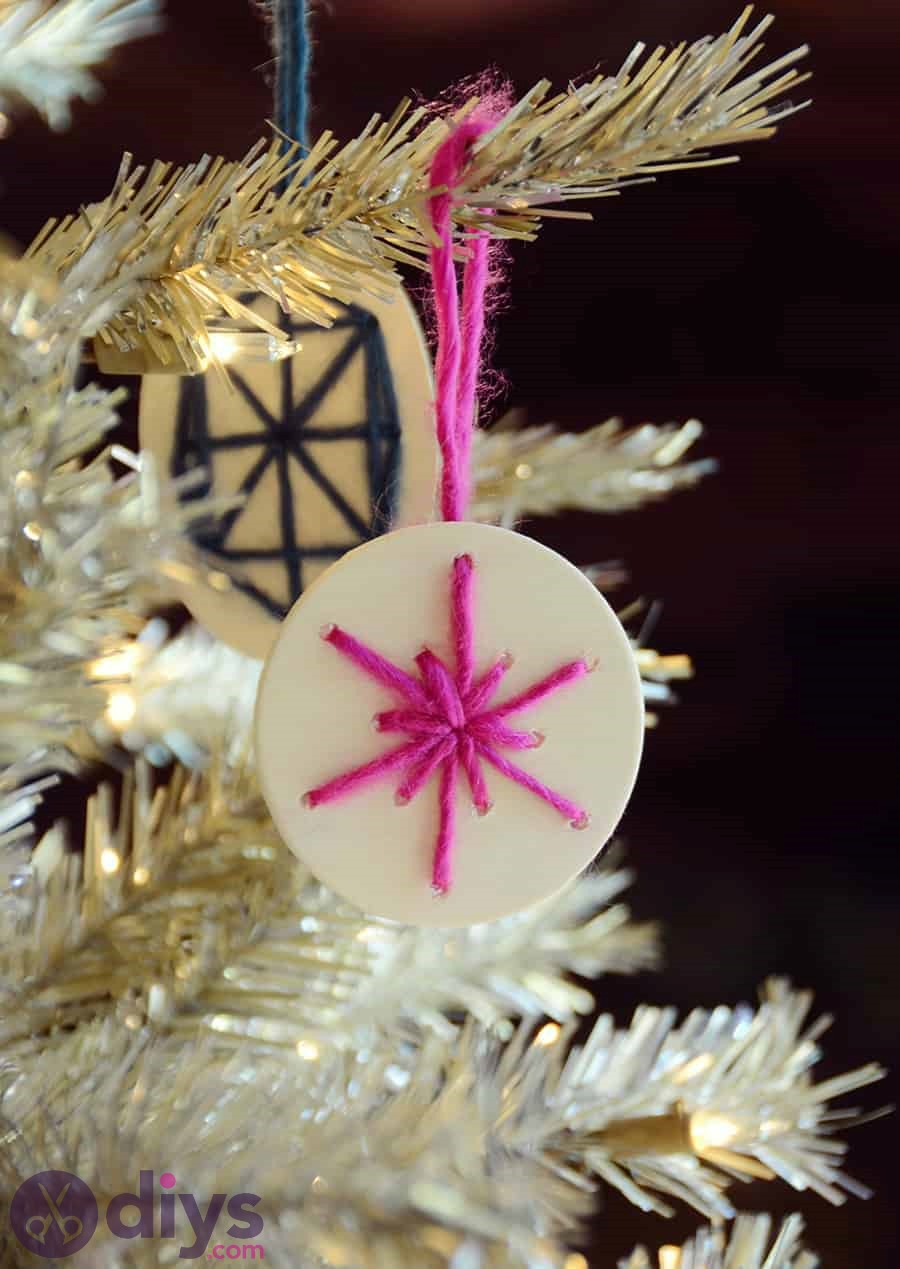
If you’re looking for a beautiful and easy DIY Christmas ornament to make with your family, try crafting geometric hand-stitched wooden slice ornaments. We assure you that it’s more straightforward than it sounds. Besides, they’ll make your Christmas tree look elegant and gorgeous.
Besides, a DIY project is one of the best ways to spend time together with the little ones. And this idea is perfect for getting the little ones off of screens and helping hone their creativity instead.
To make geometric hand-stitched wooden slice ornaments, you need a bunch of wooden slices, yarn scraps, an embroidery needle, an electric drill, a pair of scissors, and a pencil. If you’re making many tree ornaments in this manner, be sure to use yarn scraps in various colors for a bright effect.
Keep in mind that you have to drill holes in the wooden slices to crochet the yarn. So, you first have to decide on the shape. Then, drill holes in the appropriate places and start crocheting! There’s nothing else to this project.
For complete steps on how to make geometric hand-stitched wooden slice ornaments, read our complete tutorial!
32. Clothespin Angel Homemade Christmas Ornaments
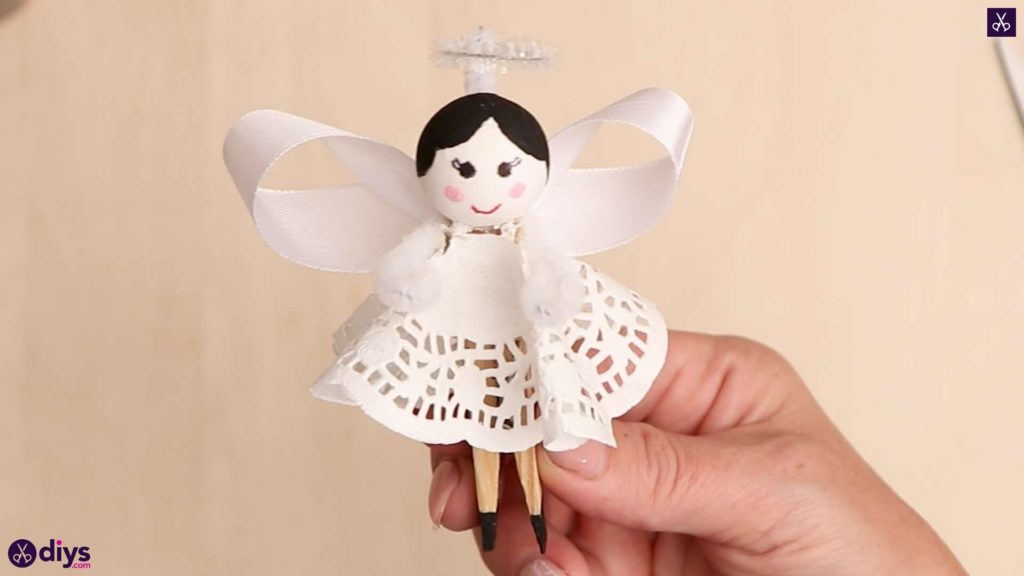
A clothespin angel is a simple homemade Christmas ornament that you and your children can craft together. It’s an excellent opportunity to teach your kids about DIY crafting. Plus, it’s easy and the results are amazing!
To make a single angel, add the following items to your shopping list: a clothespin, a spun cotton ball, a paintbrush, black and pink paint, a hot glue gun with glue sticks, black and red markers, a small lace paper doily, a dotting tool, white and silver pile cleaners, a white ribbon, and a pair of scissors.
Once you have all materials at hand, begin by painting the angel’s shoes. Then you can paint the head, add the face, make the arms and halo, create the wings, cut the dress, and assemble all pieces to form a clothespin angel using glue.
When your DIY craft is finished, you can tie a ribbon in its hair, add some small rhinestones to the halo, and throw in some glitter for effect.
To learn more about making DIY clothespin angel ornaments, check out our intuitive tutorial! There’s also a video guide available.
33. Paper Snowman – White Christmas Ornaments
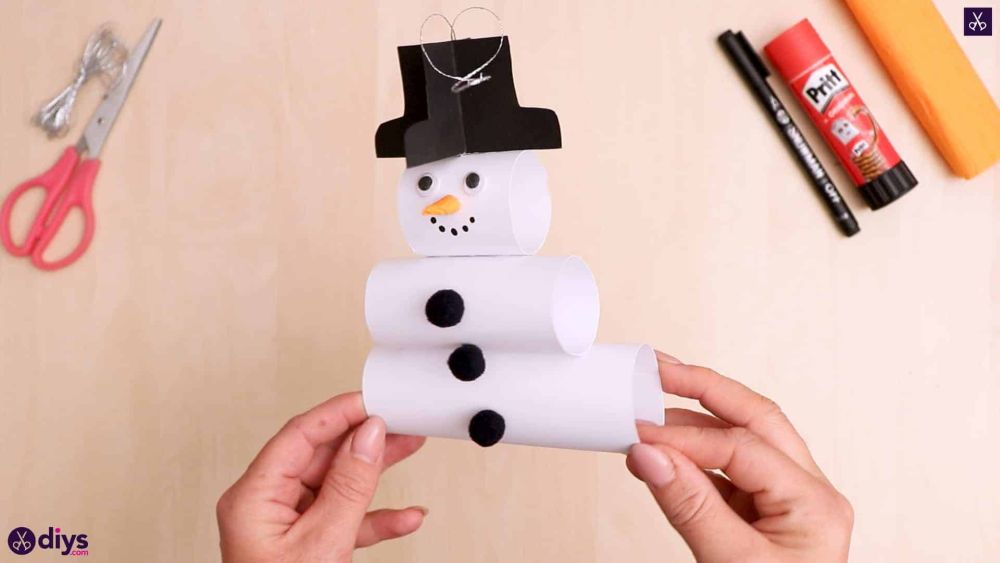
If you’re looking for a simple white Christmas ornament idea for your kids that’s easy to make and doesn’t require any special crafting skills, this DIY snowman is the right choice! It’s made from paper and promises cute results.
Plus, it’s a great project for family bonding, and the kids will love to see their little snowman hanging on the Christmas tree.
Start by gathering your materials: white cardboard, a pair of scissors, a black marker, orange crepe paper, a glue stick, silver thread, black paper, three black mini pom-poms, and two googly eyes.
Cut strips of black paper and fold them in half to make Santa’s hat. You can then make the remaining body parts, craft the body by gluing together sheets of white cardboard, add the eyes, draw the face, and attach the pom-poms.
You can find out more about making a paper snowman by following our straightforward instructions. There’s also a video guide put at your disposal.
34. DIY Paper and Felt Bow – Large Christmas Ornaments
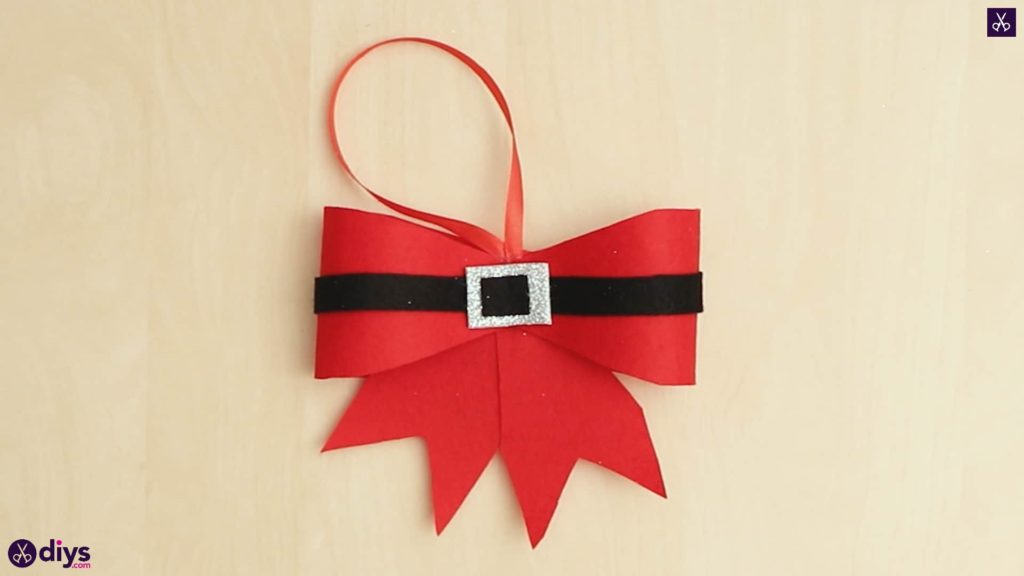
Large Christmas ornaments can be spectacular on a tree, but they can’t have a lot of weight. So, if you’re looking for an innovative idea to smuggle large decorations in your Christmas tree decorations, consider making a colorful bow using paper and felt. It’s light enough so that the tree branch won’t be weighed down.
You need black and red felt, a red ribbon, hot glue, a pair of scissors, and silver foam paper. After gathering all materials, cut small squares from the silver foam paper, a thin black felt strip, and wider red felt strips.
Then you can make the ends of the bow and assemble everything. Finally, you can add the belt, buckle, and black square. As you can see, the instructions are relatively straightforward, and you will obtain a stunning holiday decoration.
Discover the complete instructions for making a Christmas bow ornament this way by reading our complete guide, which also includes a video tutorial!
35. Pinecone Snowman Wooden Christmas Ornaments
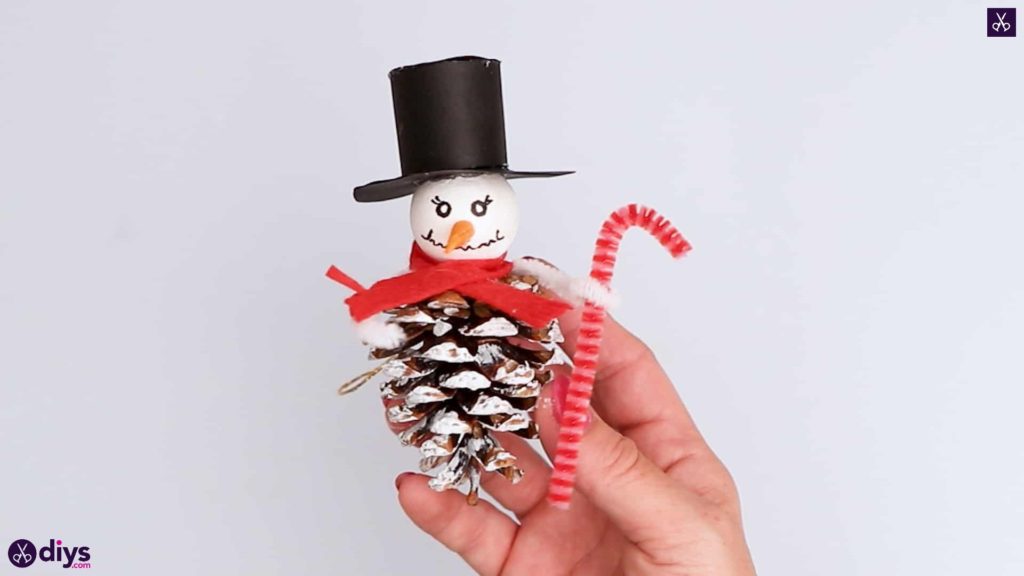
If you’re looking for wooden Christmas ornament ideas that you can make on your own at home, try your hand at pinecone snowmen! It’s not at all complicated and looks pretty cute! Besides, it’s an excellent fit if you’re thinking of recreating a winter forest theme for your Christmas party.
To make a single pinecone snowman, you need red and black construction paper, a miniature styrofoam ball, a paintbrush, a pinecone, white paint, a glue gun with glue sticks, a gold string, orange crepe paper, red and white pipe cleaners, and a black felt tip pen.
Start by cutting the black paper to make a cylinder and a hat before gluing them together. Then you can make the arms, hands, and cane and create a loop out of the gold string. In the following steps, prepare the scarf and head before sliding on the arms, adding the arms, and gluing the hat.
Finally, you can make the face, glue the nose, and paint the tips of the pinecone white. And that’s it! You can now hang this adorable ornament on your Christmas tree. Feel free to create several pieces this way if you’re going with an all-natural theme for your party.
Learn more about making pinecone snowmen by reading our full guide! You can also watch a video tutorial.
36. Olaf – Disney Christmas Ornaments
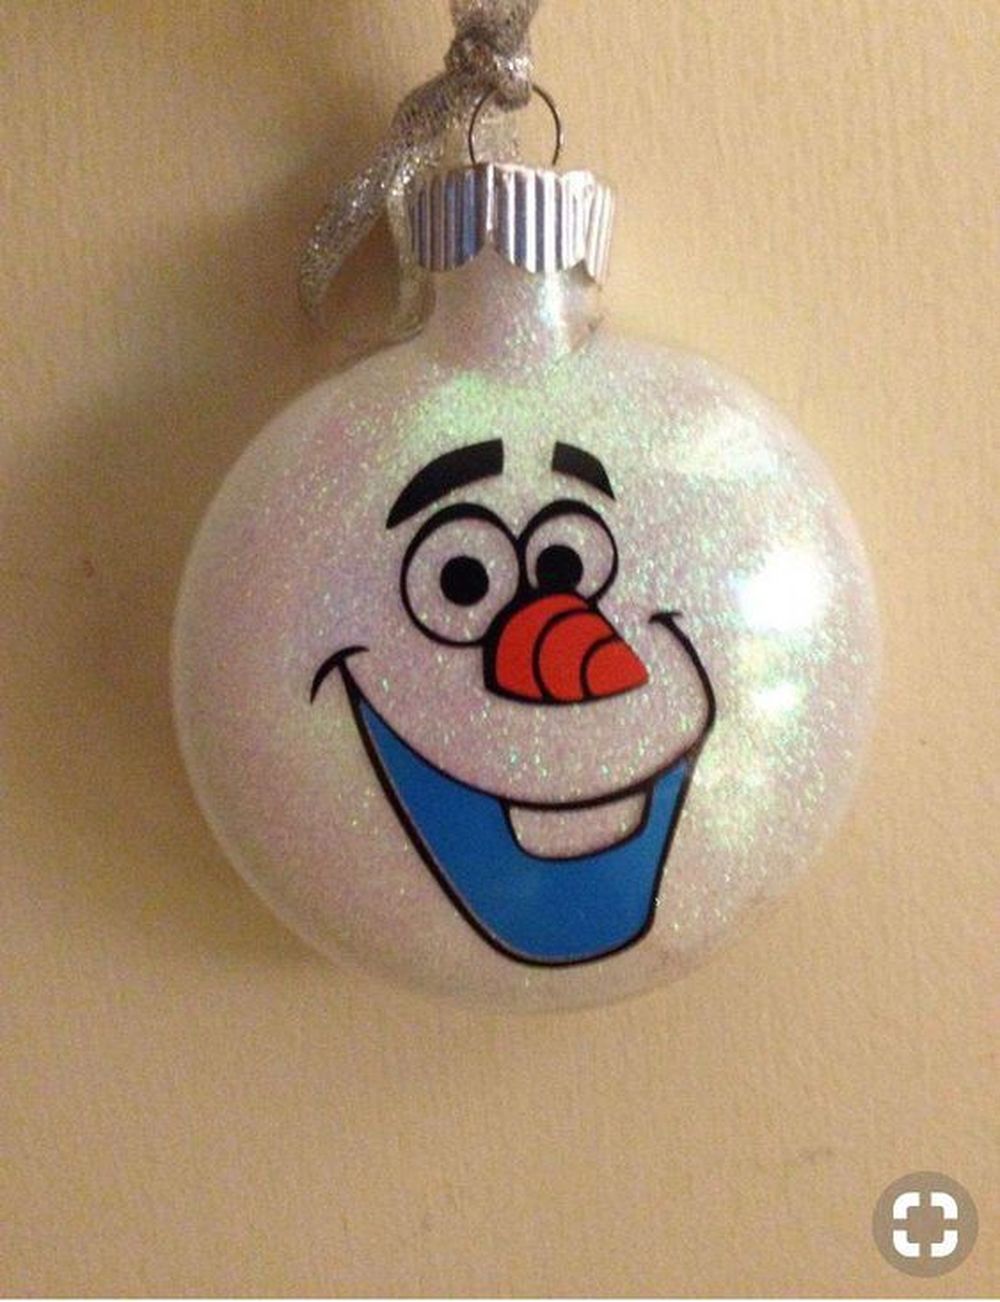
If you’re looking for Disney Christmas ornament ideas, Olaf is the perfect companion to warm your heart in wintertime! You can make this DIY decoration yourself following instructions that are easy to understand and implement. It’s a wonderful option if you want something simple but charming that your kids will adore.
To make an Olaf ornament, gather six white felt circles of different sizes, black felt, a red pom-pom, yellow cardstock paper cut in half lengthwise, permanent markers (black and orange), and a hot glue gun with glue sticks.
It’s also a good idea to have scissors, tweezers or toothpicks, embroidery thread (white), all-purpose thread (black), a sewing needle set composed of needles and a needle threader, and fabric glue.
After gathering all materials, it’s time to assemble the pieces. Simply glue circles into the body of Olaf using fabric glue. Then you can thread the embroidery thread through everything before knotting, twisting, and gluing at the backside. Once again, you need to use hot glue for this purpose!
Next, it’s time to create hands by cutting out orange paper squares with black eyes on them before adding pupils with permanent markers. Then you can make holes in each hand, followed by threading sewing needles through them one by one. After this step, you can tie knots on the other side and cut off any excess material. Finally, you can add arms and pom-poms using hot glue!
If you feel like these instructions are too complicated to follow, you can make a simpler version of Olaf by painting its facial expressions on a clear Christmas ornament that you can fill with glitter. Check out this Pinterest post for more inspiration!
37. Small Wreath – Christmas Ornaments
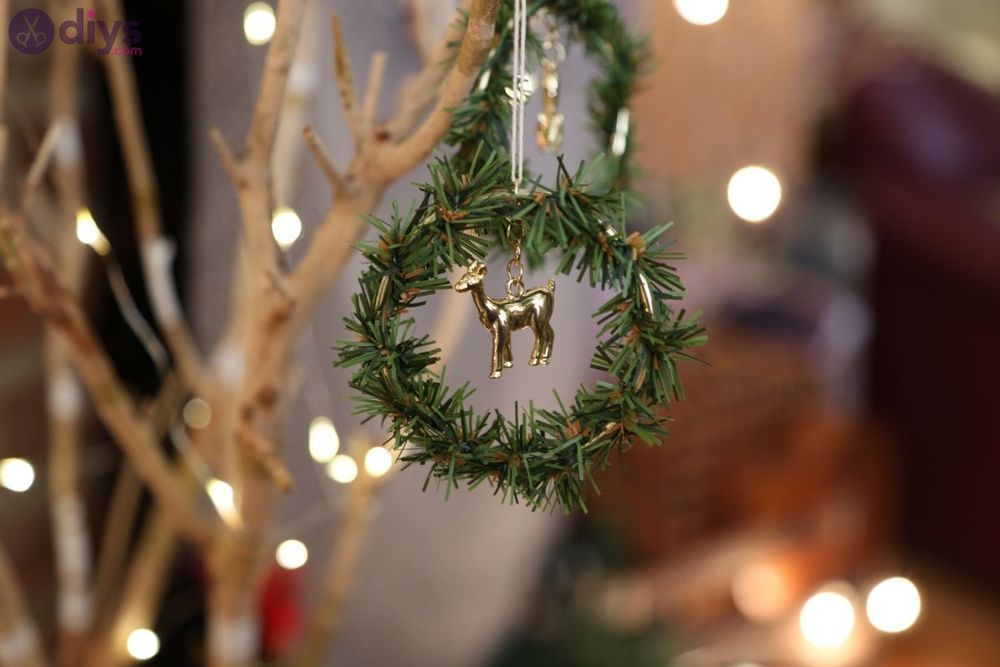
A wreath is a common household item, but if you turn it into a Christmas decoration, it might be a unique addition to your holiday decor! This DIY Christmas ornament project is very simple and doesn’t require too much time or effort.
The innovative part of this idea is that, instead of making a large wreath to hang on your front door, you’ll be making a small one to use as a Christmas tree ornament.
Start by collecting all the necessary supplies: a miniature pine garland (wired), 3-inch metal rings, a pair of scissors, charms, jewelry liers, a string or a fishing line, and 7mm gold jump rings.
You can view the complete steps for this Christmas tree wreath ornament in our intuitive guide!
38. Doll – DIY Christmas Ornaments
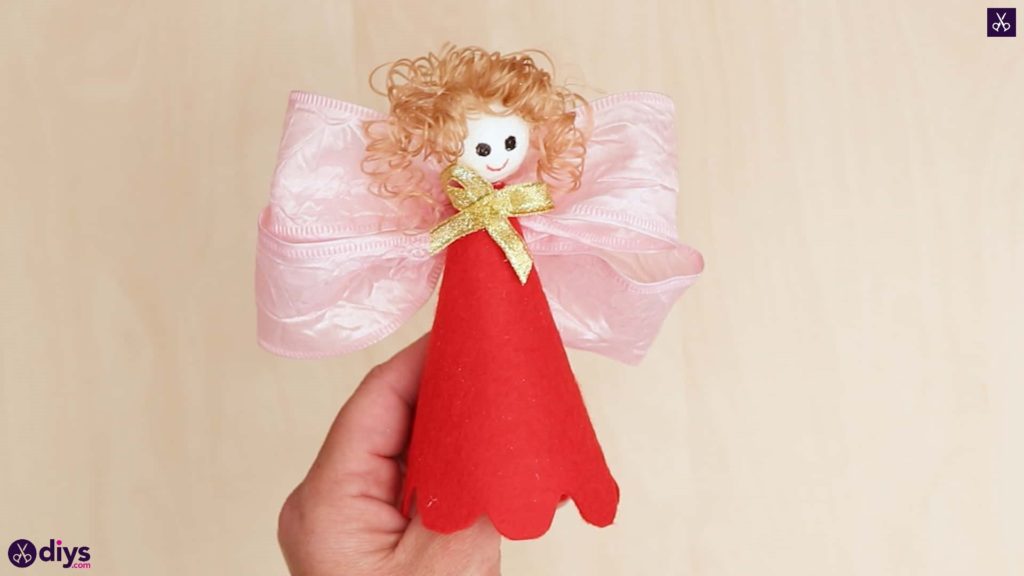
Ideas for DIY Christmas ornaments can be as different as night and day, but this one is more than unique: a doll. It’s an excellent idea for children who can explore their creativity, as well as a good way to keep the memories of your kids alive.
Here are the supplies you need for this project: pink and gold ribbons, gold thread, a spun cotton ball, doll hair, red felt, a pair of scissors, black and red markers, hot glue, white glue, glitter, a dotting tool, and a paintbrush.
Find out all about making doll ornaments for the Christmas tree in our intuitive guide!
39. Cinnamon Bundles
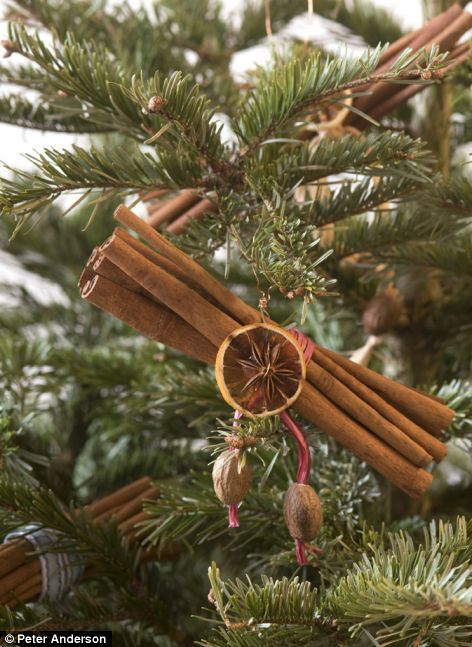
Add some aromatherapy to the tree and your home by putting together some cinnamon bundle ornaments. Hop on over to the Daily Mail for the details.
40. Toilet Paper Reindeer
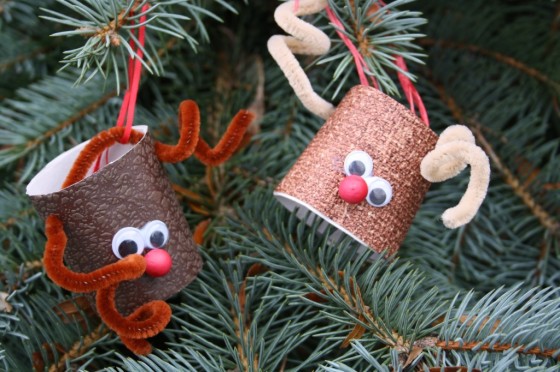
Gather the kids around and allow them to dive right into this family-friendly Christmas craft. Use some old toilet paper rolls and start designs your very own reindeer like these from Happy Hooligans.
41. Applesauce Hearts
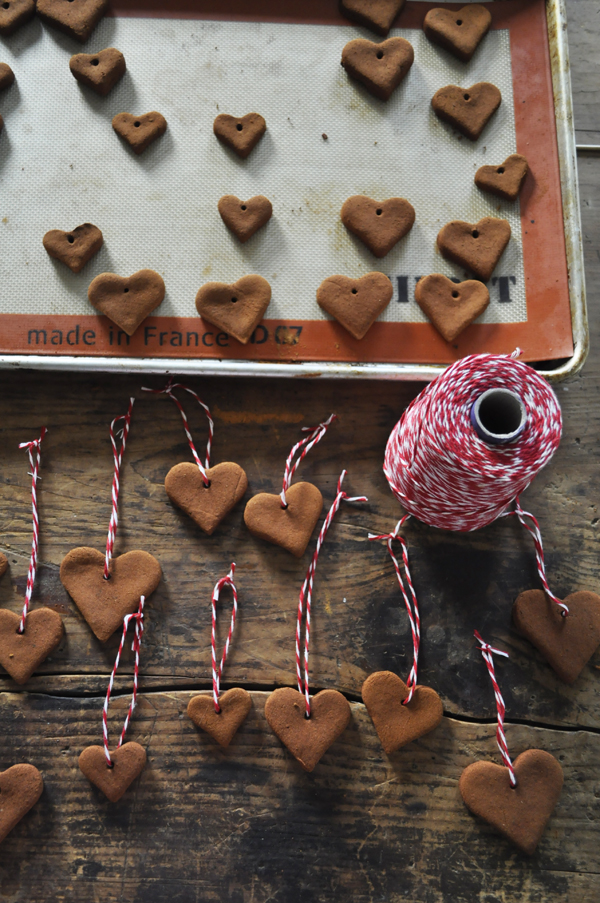
Make these sweet-smelling ornaments with the help of Katie Elliot. It’s perfect to do with the family and you’ll love the cinnamon fragrance.
42. Wrapped Custom Christmas Ornament
Over at Offbeat & Inspired you’ll find the know-how for making these easy wrapped Christmas ornaments. Use newspaper or even fabric to get yourself started.
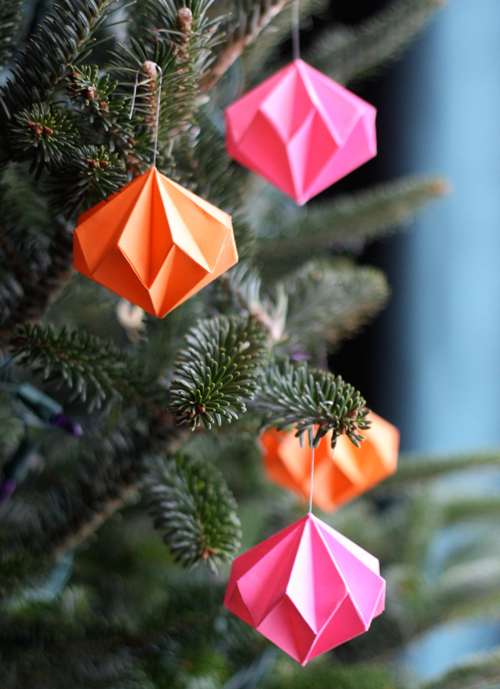
43. Origami Diamonds – DIY Christmas Ornaments for Kids
How About Orange featured these absolutely adorable origami diamonds and we think they’d be a wonderful addition to a fun and festive Christmas tree. And the entire family can make some!
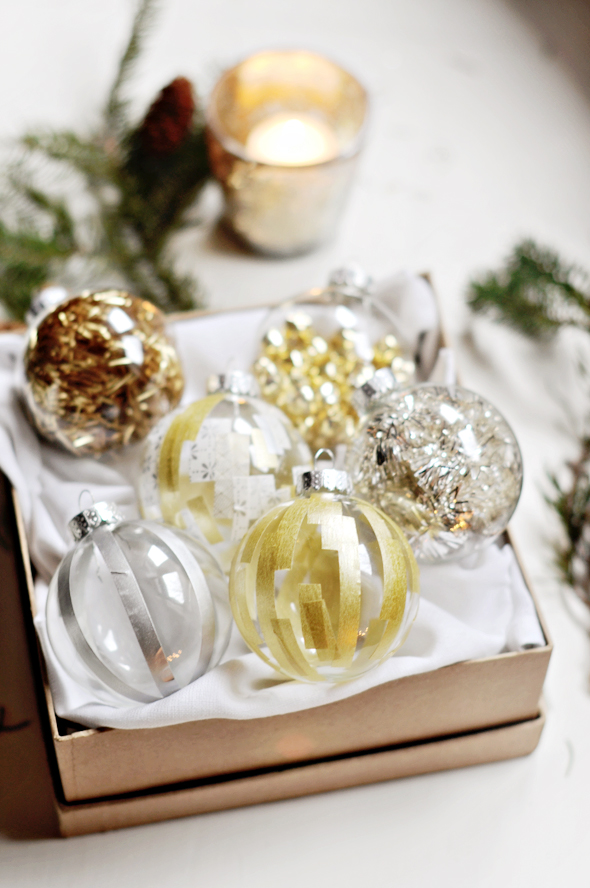
44. Washi Tape DIY Christmas Ornaments for Kids
Odessa May Society took everyone’s favorite, new craft supply and put it to good use. With some simple glass ornaments and some washi tape you can create a design all your own.
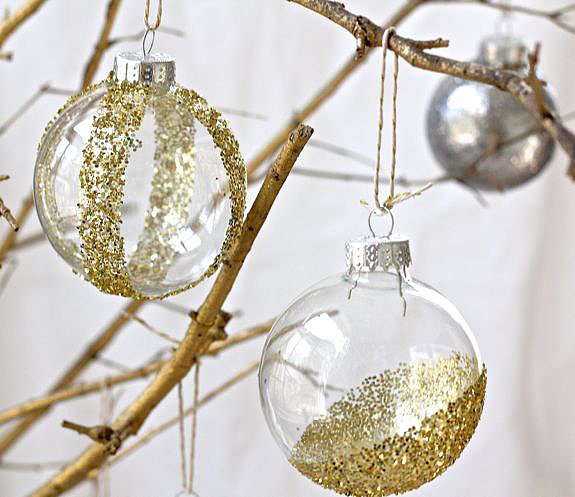
45. Glitter DIY Christmas Ornaments for Kids
Of course you can always do what Hello Natural did and dip your ornaments in some glitter for an extra pop and sparkle at Christmastime!
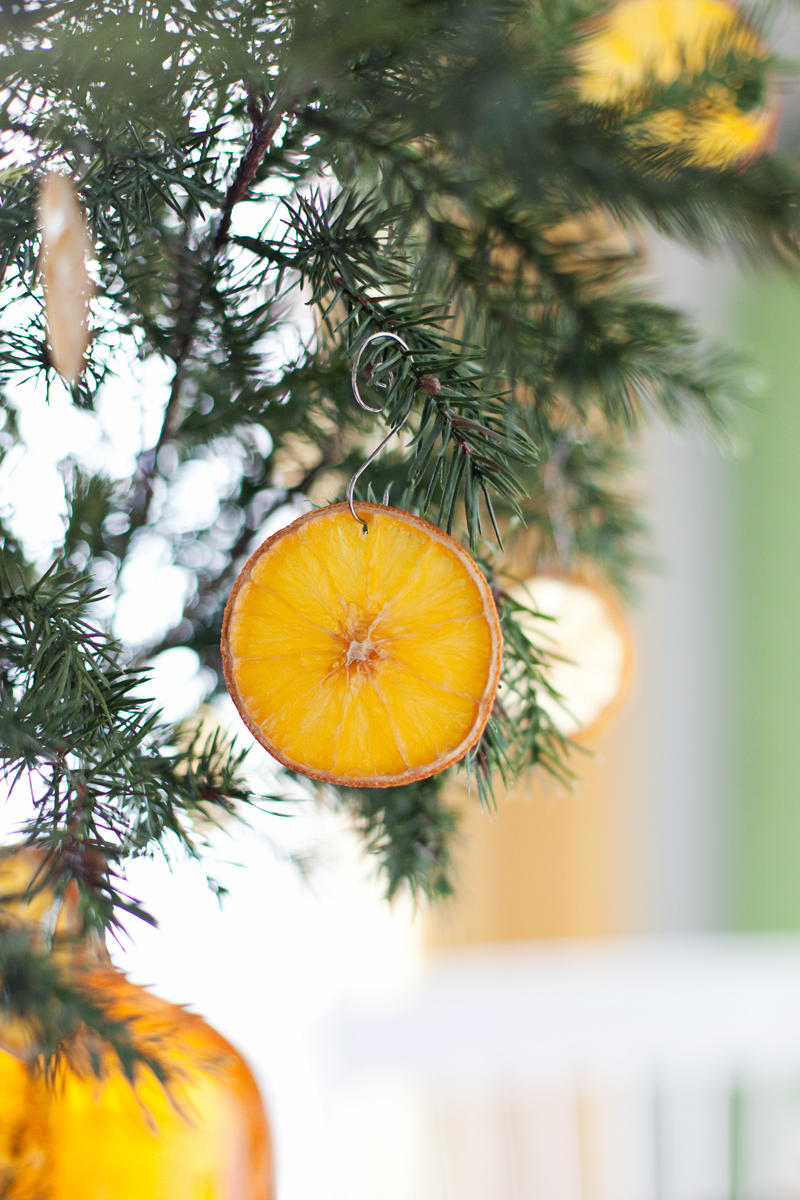
46. Dried Citrus – Easy Custom Christmas Ornaments
Reminiscent of stained glass you can use these all natural bits to bring a new breath of lightness and life into your Christmas decor this year. Thanks to A Beautiful Mess for the idea!
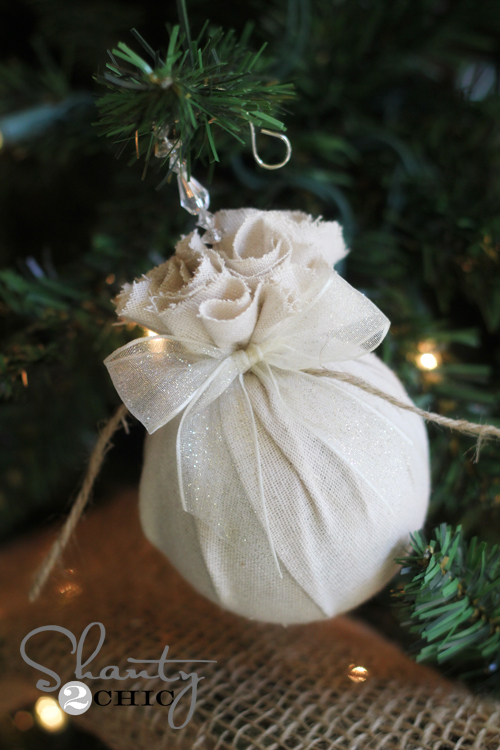
47. Fabric Christmas Ornament
Shanty 2 Chic gives us a super easy idea to add some shabby chic charm to our Christmas trees. Take old glass balls and some fabric scraps and get to work!
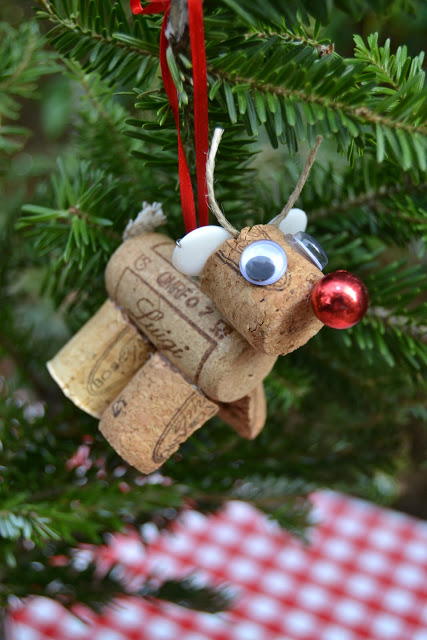
48. Cork Reindeer – DIY Christmas Ornaments for Kids
Utilize your stash of wine corks and get creative with them. There’s a variety of ornaments you can make out of them all shown at The Homeless Finch. This reindeer just happens to be our favorite.
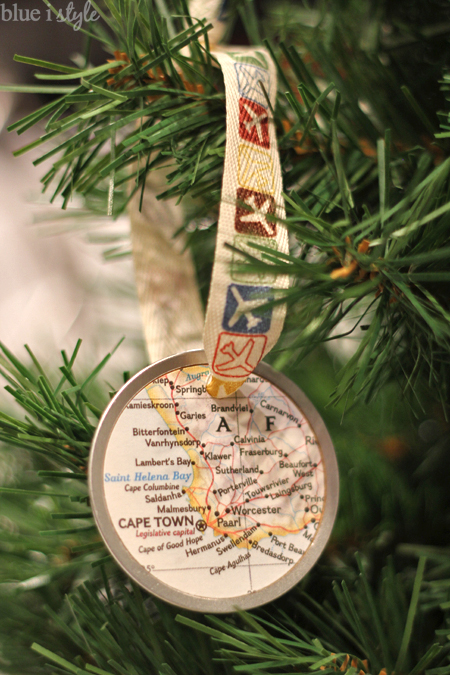
49. Custom Christmas Ornaments with Maps
Blue i Style gives us a great tutorial on how to create our very own travel-inspired ornaments. Grab some old maps, or print them out and get started!
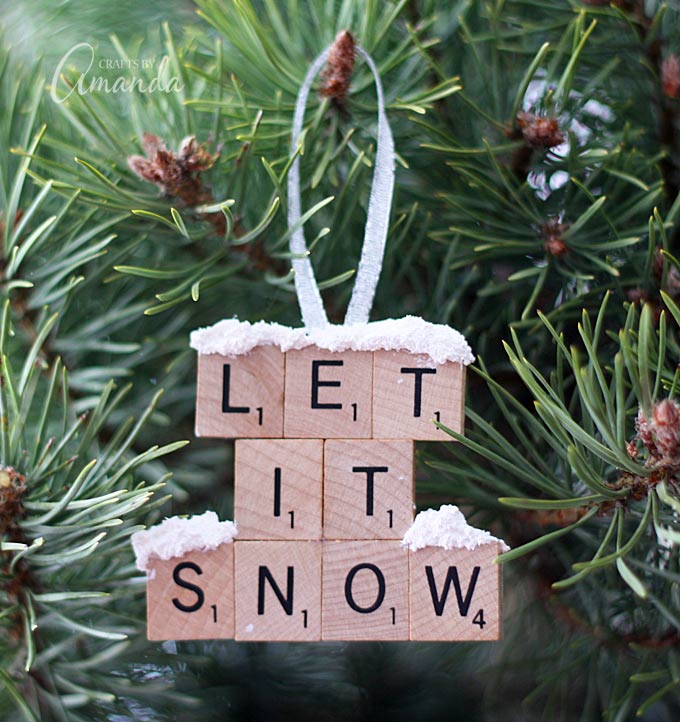
50. Scrabble DIY Christmas Ornaments for Kids
Crafts by Amanda took some old Scrabble pieces and put them to good use. These could also make great neighbor or friend gifts as well!
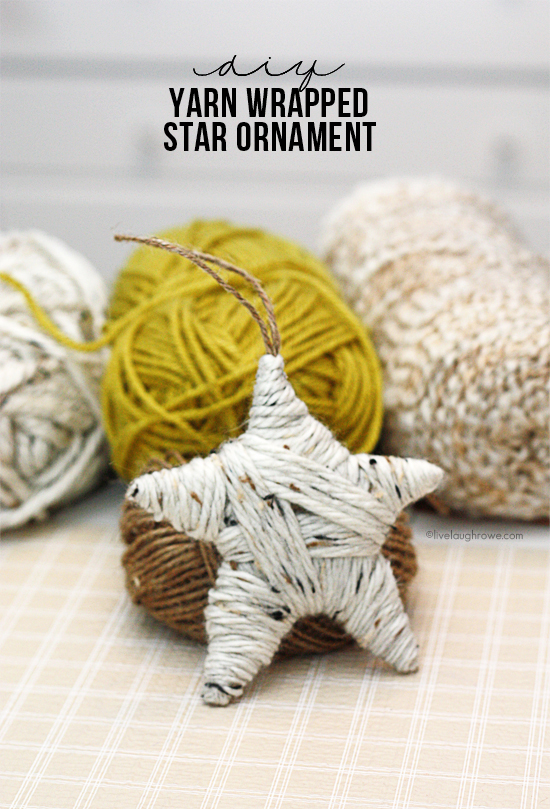
51. Yarn-Covered Christmas Ornament
Yarn is always a great crafting material, especially to wrap up some ornaments like you see here from Live Laugh Rowe. Stars, baubles and the like can be wrapped with ease!
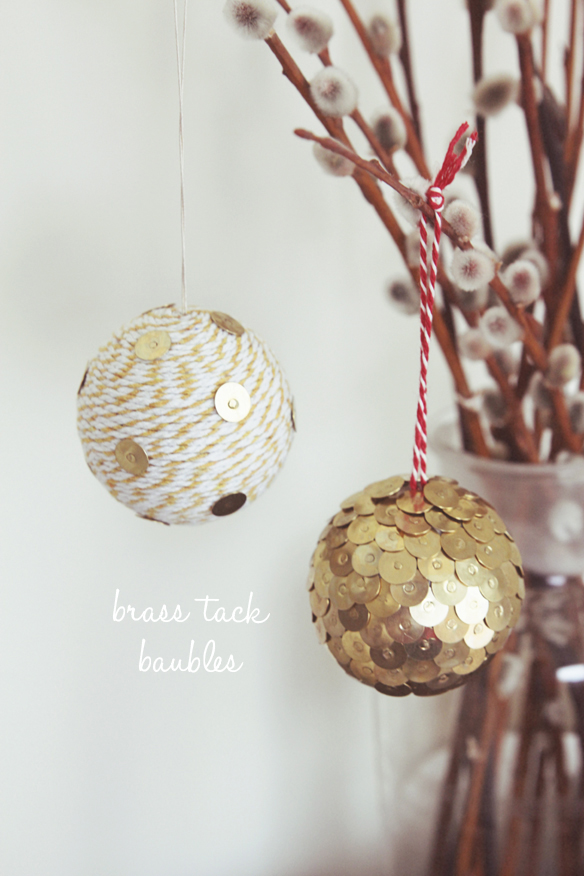
52. Brass Tack DIY Christmas Ornament
These brass tack baubles are pretty perfect for those envisioning an elegant, white, and sparkling Christmas. Learn how to make them at Fellow Fellow.
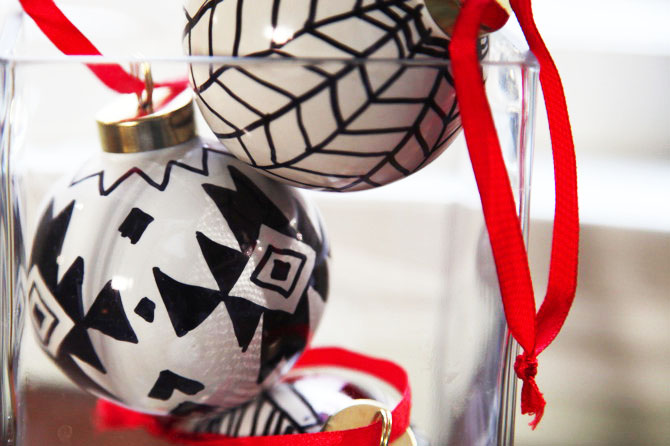
53. Sharpies DIY Christmas Ornaments for Kids
Grab the family, gram some Sharpies and start designing the ornaments of the season! Pretty Prudent gives us the directions and one of the best projects for the family to get involved in this weekend.
Christmas Ornaments to Buy
If you’d rather buy some Christmas ornaments, we have a few ideas about that too. Since we’re pretty sure you’ll already stacked when it comes to newer simpler models, how about some vintage ones? Let’s check these out too!
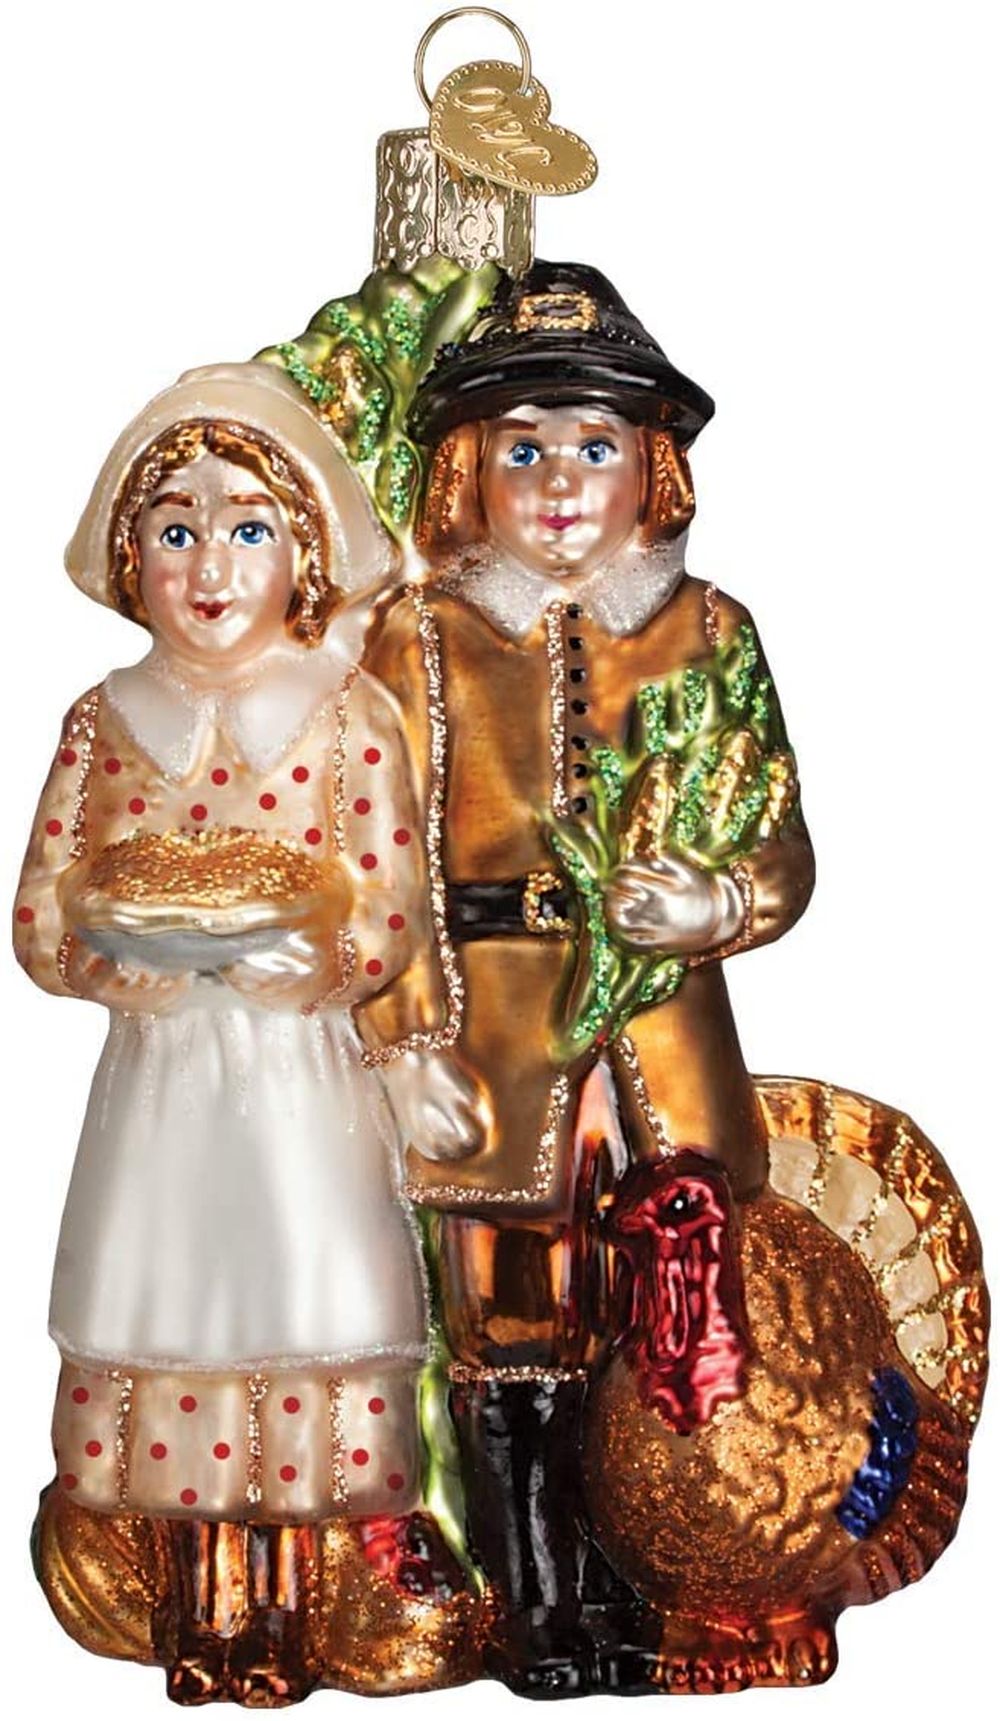
54. Pilgrims – Old-World Christmas Ornaments
If you’re interested in old-world Christmas ornaments, you can always go with pilgrims! However, it can be challenging to craft pilgrims without making them look silly, so it might be best to buy these ornaments from an online shop.
We found some interesting-looking pilgrims on Amazon, which you can buy at a fair price. They are made of glass, handcrafted and multicolored. Besides, these ornaments have metal rings at the top so that you can easily hang the ornaments on your Christmas tree.
View price on Amazon55. Vintage Christmas Ornaments
If you can’t find vintage Christmas ornaments at the local shop or in your mom’s attic, you can just buy them from Amazon. For example, these items we found are made of shatterproof plastic, so you won’t have to worry about your kids accidentally knocking over the Christmas tree and breaking everything.
Plus, the package includes ornaments in multiple colors, so there are plenty of options to choose from.
View price on AmazonFinal Thoughts on Christmas Ornaments
There are many ways to embellish old ornaments, like painting them. But you can also make new ones yourself. We hope that the ideas we shared in this article will help you with your DIY decorating just a bit.
What are your favorite ideas when it comes to Christmas ornaments? Feel free to share your thoughts with us in the comment section below! Remember to have fun and do not stress yourself out too much because the outcome is all that matters!
The post 55 DIY Christmas Ornaments: From Easy To Intricate! appeared first on DIYs.com.

