

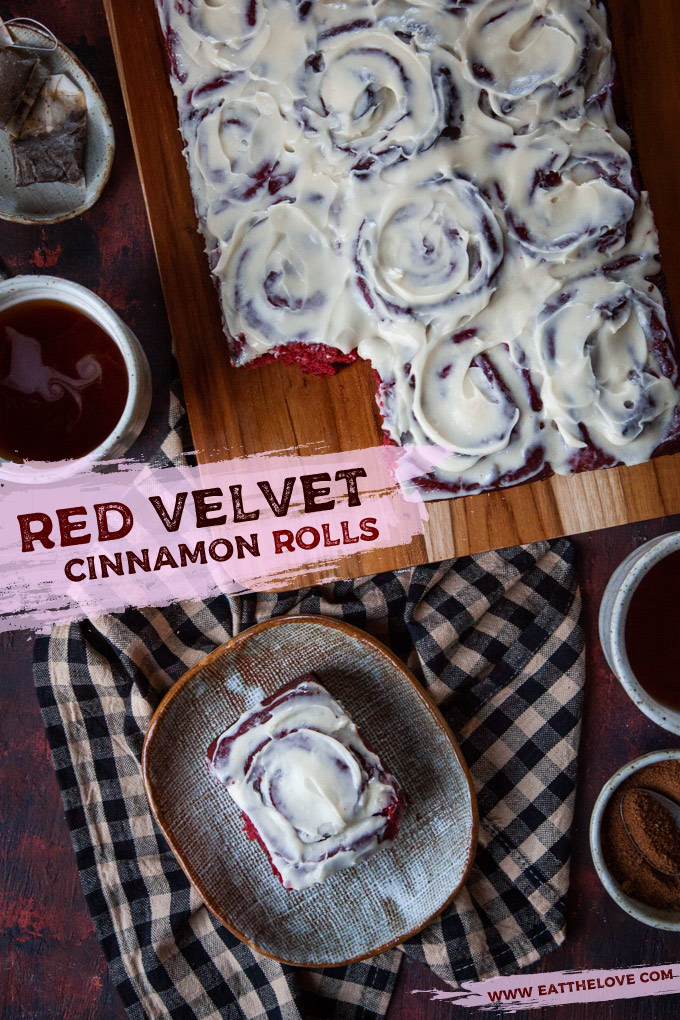
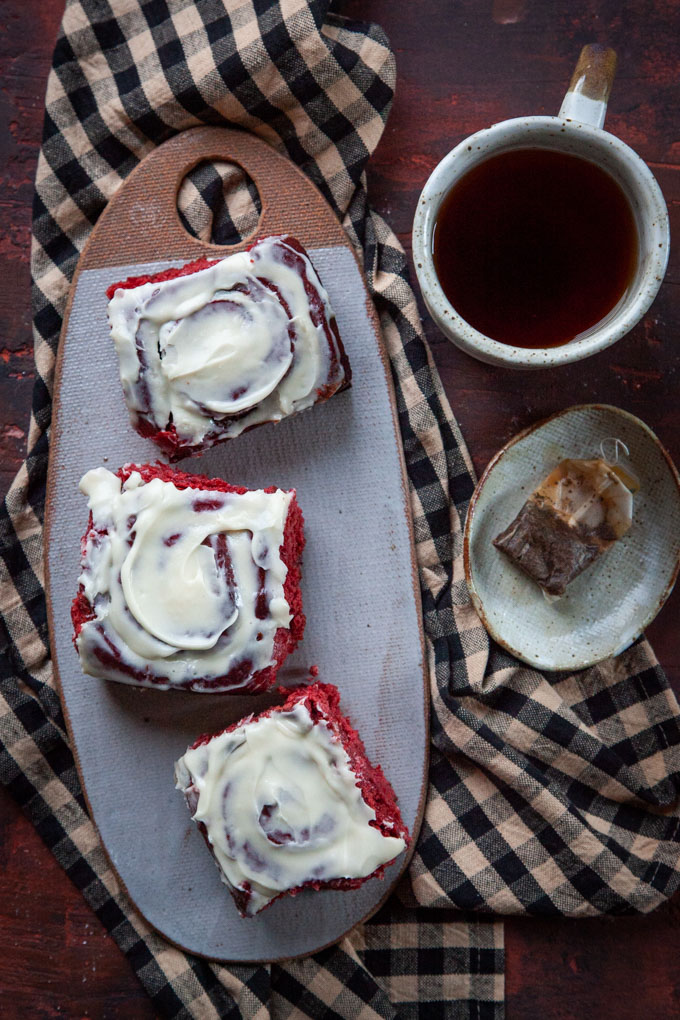
These red velvet cinnamon rolls are inspired by red velvet cake! It has a touch of cocoa in the dough and is frosted with a tangy cream cheese frosting.
Just when I thought winter was over here in San Francisco, we get an insane cold spell (well, cold for San Francisco) and I start pulling out the heavy sweaters again. And with the cold weather, I start thinking of baking projects that will warm up my kitchen. Deep dives into my blog archive makes me think that maybe its time I make my blood orange and coconut velvet cake which is a riff on red velvet cake. Which lead me to my red velvet smores which are a fun project. Then, after having an unsatisfying cinnamon bun at a coffee shop (it was doughy and underbaked) I realized I had wish I had some of my eggnog cinnamon rolls but I no longer had any eggnog in my fridge! But I still needed to rectify that poor cinnamon roll experience immediatelyso I made red velvet cinnamon buns. Clearly I had red velvet on my mind!
What exactly is red velvet?
There have been articles upon articles about the history of red velvet cake. Red velvet is a layer cake that has a soft tight crumb, almost like velvet and frosted with cream cheese or ermine frosting. Red velvet cake is a cake with a touch of cocoa in it and traditionally was made without dye, allowing the natural red color of the cocoa to shine through. Modern red velvet cake uses red dye to up the red factor.
Ive taken inspiration from that traditional red velvet cake and turned the flavors of a mildly chocolate cake into a cinnamon bun, sticking with a common tangy cream cheese frosting for the rolls.
How do you make red velvet cinnamon buns?
Like regular cinnamon buns, you make an enriched dough, which is just a fancy term for bread dough that has eggs, butter and milk in it. To make it red velvet, you add 1/2 cup of unsweetened cocoa powder and a tablespoon of red food coloring.
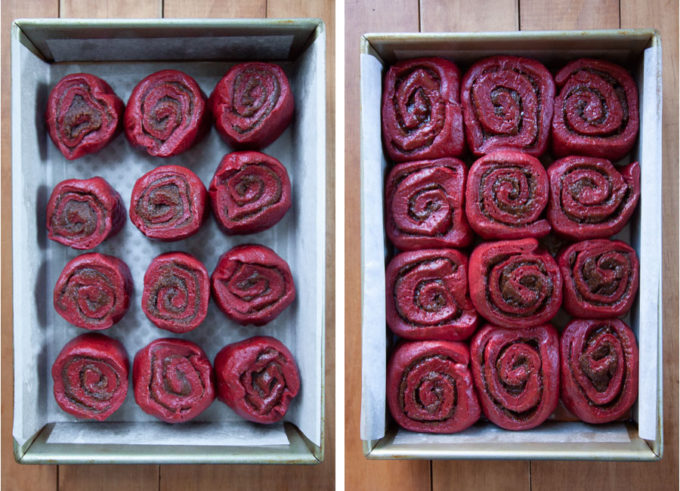
Once the dough is made and risen you roll out it out, spread the cinnamon filling over it, then cut the dough into 12 individual disks, let it rise again, and then bake.
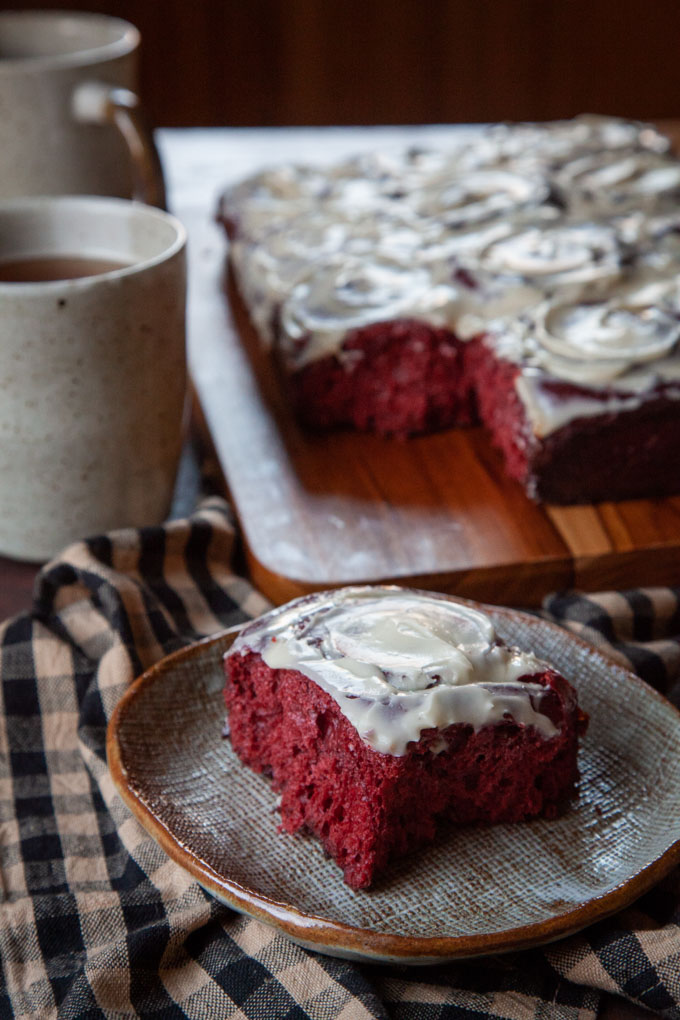
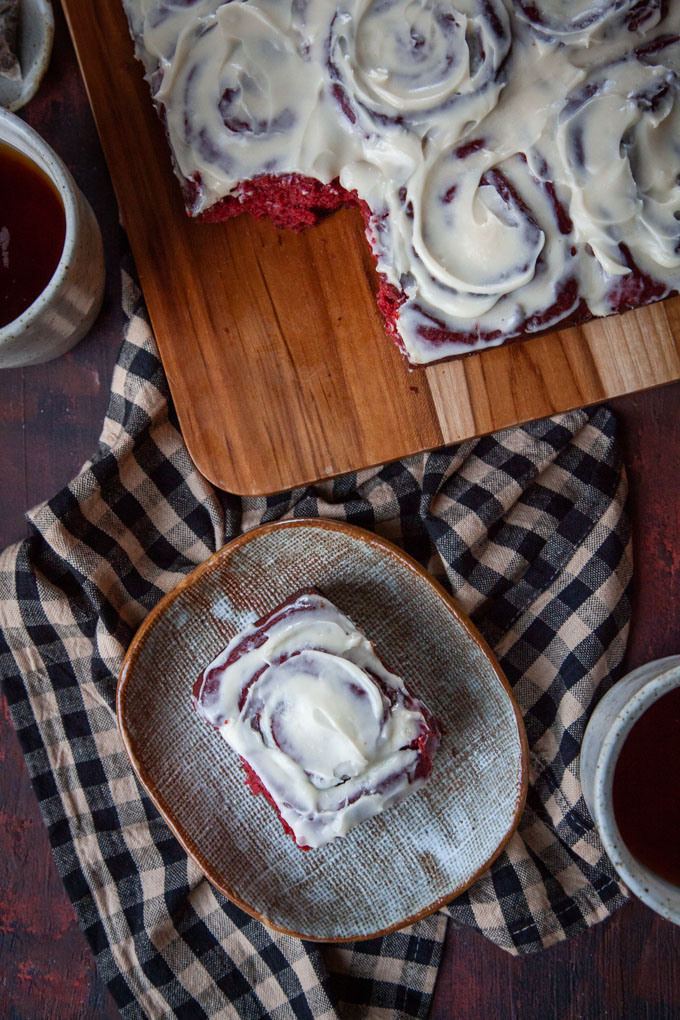
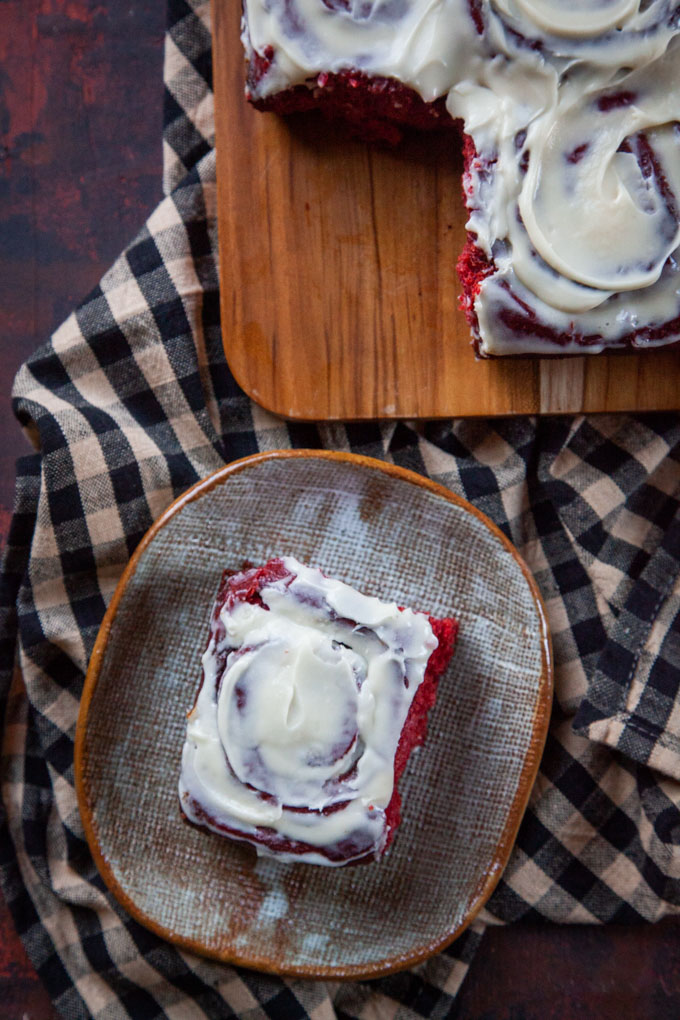
Once baked, you frost it a cream cheese frosting and you have red velvet cinnamon rolls!
What makes this recipe different from other red velvet cinnamon rolls recipes out there?
The majority of red velvet cinnamon roll recipes Ive found use a pre-made cake mix as the base for their dough. Though I have nothing against cake mixes, I prefer to make most of my recipes from scratch.
This recipe is similar to a yeasted cinnamon roll recipe but with the addition of red food coloring and some cocoa powder. But the flavor is much more true to a red velvet cake made from scratch than any cake mix version.
Can you make these cinnamon rolls over the course of a few of days or turn them into overnight cinnamon rolls?
Yes! Making cinnamon rolls (any form of yeasted cinnamon rolls) seems time consuming, but you can totally break down the recipe into chunks of preparation, letting the dough sit overnight in the fridge.
On the first day, make the dough and instead of letting it rise until double, just cover it in the bowl and let it sit in the fridge overnight. Then take it out the next day, bring it room temperature (about 2 to 3 hours depending on the temperature of your kitchen) and then proceed with the recipe.
On the second day, once the dough has risen and doubled in size, roll it out and slice the individual disks and place them in the baking pan and then cover and refrigerate the entire pan.
On the third day, bring the pan back to room temperature (again, 2 to 3 hours) and then bake them off.
You can, of course, combine any of these steps together, letting the dough rise and then rolling it out and refrigerating it for an overnight recipe.
Let the dough rise in the fridge actually improves the texture and flavor of the dough as well, so its a win-win situation!
How do I make the cinnamon roll dough rise faster?
Because of the food coloring and the cocoa powder in the dough, these cinnamon rolls do rise a little slower than regular cinnamon rolls. If you want to speed up the rise time, you need to place the rolls in an environment that will help the yeast grow!
To do that you need a warm environment. Here are few suggestions to help create the optimum environment to help the dough rise:
- Proof setting of your oven: Some new models of ovens (and toaster ovens) even have a proofing or warm setting. This is the easiest option if you have it! Just place the bowl in the oven or toaster oven and use this setting.
- Direct sun: You can place the bowl in direct sunlight under or near a window. The sun and heat will help rise the dough faster.
- Oven light: You can place the dough in an oven with the oven light turned on. The light should warm up the oven slightly.
-
Oven heat: You can turn the oven on to 200F (or the lowest temperature it will turn on to). Then, once the oven has started to warm up, immediately turn the temperature off. This will warm up the oven enough to help kick start the yeast growth.
Check the oven periodically (every 20 to 30 minutes or so) and if it too cold, repeat this trick by turning the oven on and then off again. Just remember to turn the oven off! If you leave it on, the rolls will bake without rising! Worse, you might melt the plastic wrap over the rolls, which will ruin the pastries, and make the pan difficult to clean (I know this from experience!).
- Hot water method: Boil some water in a kettle or on the stovetop. Then pour the boiling hot water into a large roasting tray. Move the tray to the bottom rack of the oven. Then place the bowl on the top rack of the oven. The heat from the hot water will help warm up the oven and help the rise. This is method is safer than turning on and off the oven as you dont have to worry about forgetting to turn the oven off and accidentally baking the dough or melting the plastic wrap. You may want to reboil the water or boil new water throughout the rise time as it cools.
- Cast iron skillet method: This is easiest and favorite method of mine! I heat a large heavy cast iron skillet on the stove until its piping hot. Once hot, I remove it from the stove and place it on the lower rack in the oven. Then I place the dough in a bowl on the top rack. The heat from the skillet warms the entire oven and creates a nice environment for the dough to rise faster. This is similar to the hot water method but the cast iron skillet stays hotter longer than the roasting pan. Plus its less messy and you dont have to deal with all that water. Theres no risk of forgetting to turn the oven off as well, so this is great for those busy folks that are multi-tasking. About halfway through the rise time, I check the pan. If the skillet has gotten cold, I heat it up again on the stove and then replace it in the oven.
How do I make the frosting for cinnamon rolls?
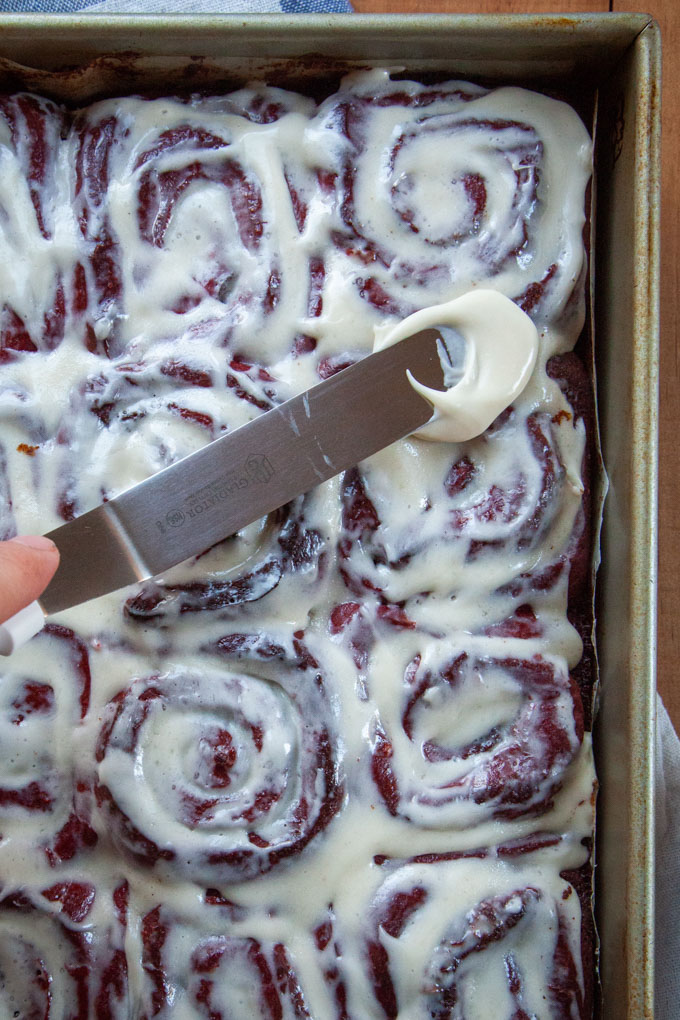
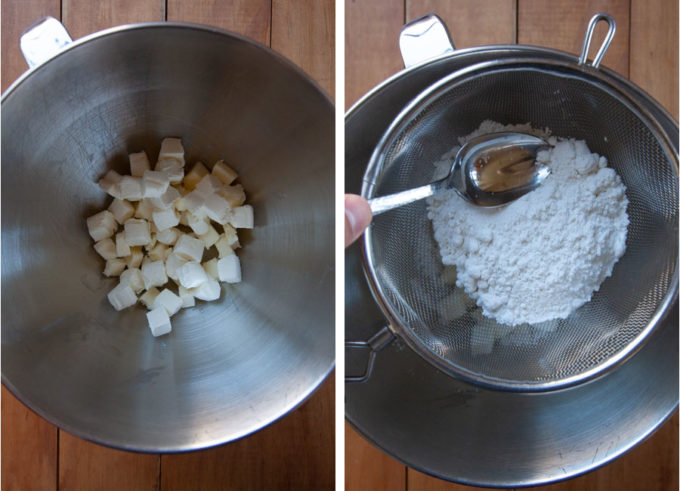
The most common frosting for red velvet cake is a cream cheese frosting, which coincidentally is also the most common frosting for cinnamon rolls! Making the frosting for the cinnamon roll is easy, you just combine all the ingredients for the glaze in a bowl and mix. But I highly recommend that you warm up the cream cheese and sift the powdered sugar before you start mixing the ingredients. This will prevent lumps in the frosting. Lumps that are nearly impossible to get out once you start mixing the frosting together!
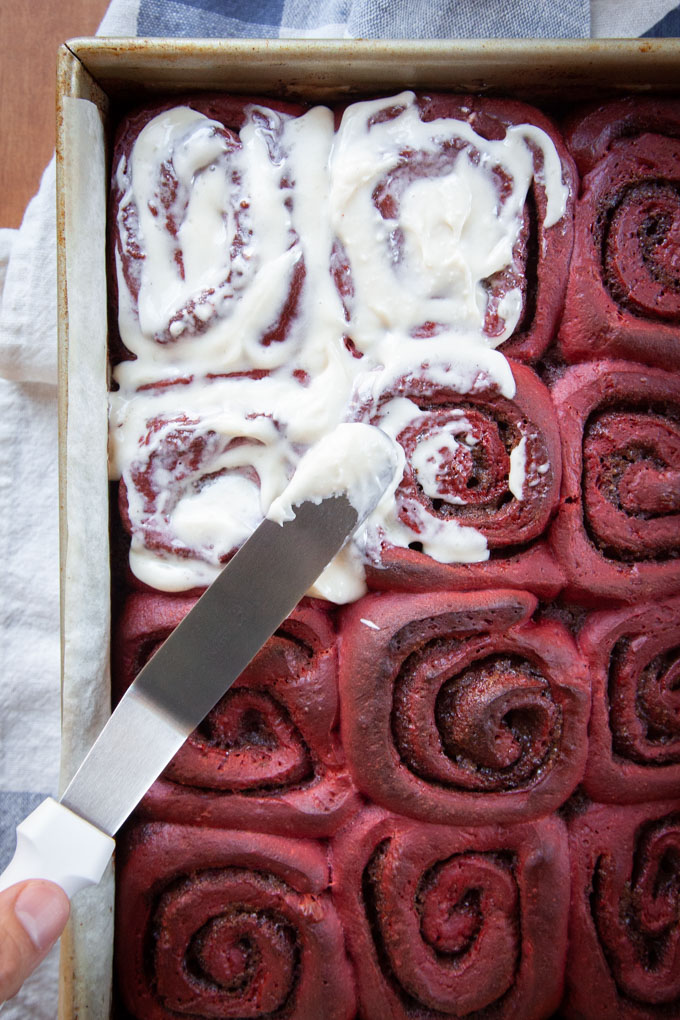
I spreading half the frosting over the hot cinnamon rolls right out of the oven so the rolls get a melty glaze that pools into the crevices of the roll. This ensures the rolls stay moist completely. Once cooled, I spread the remaining frosting over it.
What if my frosting is lumpy? Is there a way to get rid of the lumps in cream cheese frosting?
Weve all been there! You didnt let the cream cheese or butter warm up and all of sudden you have lumpy frosting. Ugh!
No matter how much you cream or beat your frosting, if its lumpy, it will stay lumpy. But there is a solution. Place a large rimmed baking sheet in your freezer for 15 to 20 minutes or until it is cold to the touch. Meanwhile microwave the frosting in a microwave safe bowl in 10 to 15 second increments, stirring until the frosting is completely smooth and the lumps are gone. At this point the frosting will be warm and liquidy.
Once the rimmed baking sheet is cold, place a piece of aluminum foil over it. Pour the frosting glaze over the foil and spread it out with a spatula, moving it back and forth to cool it. As the frosting cools from the cold metal, it will form up. Scrap it up off of the baking sheet once its at the right consistency and firmness for you. You have smooth cream cheese frosting!
If you have time you can skip the baking sheet in the freezer and just place the bowl of warm frosting in the refrigerator to cool it down and firm it up. But this will take an hour or two at the minimum. The cold baking sheet trick does this much faster.
Or, if the above sounds like too much trouble, just spread the frosting over the cinnamon rolls as is. It will be delicious. They just might not look Pinterest Perfect but no one will care once they taste them!
How do you store red velvet cinnamon rolls?
The best way to eat them is to eat them the day you bake them! But you can store them at room temperature on your counter, in an airtight container or under tight plastic wrap for up to 48 hours. Keep in mind the longer you keep them around, the less fresh they taste.
You can also extend the lifespan of cinnamon rolls by refrigerating them. They should last up to a week in the refrigerator, again stored in an airtight container or under tight plastic wrap.
Can you freeze red velvet cinnamon rolls?
Yes you can! Make sure the rolls are completely cooled to room temperature and then freeze them either in the pan or separate them apart, freeze them on a baking sheet until frozen (about 2 hours) and then store them in a large resealable freezer Ziploc bag. They can be frozen with or without the frosting, though keep in mind the frosting will be a little more sticky and gooey once thawed due to condensation.
Defrost the rolls on the counter, for about an hour or try microwaving one roll at 50% power for 45 to 60 seconds. Keep in mind that when you thaw the in the microwave, the frosting will get pretty melty.
Can I freeze unbaked rolls?
Why yes, you can! If youre the sort of person that plans stuff out in advance (not me) and has extra space in the freezer (definitely not me) you can TOTALLY make these rolls and then freeze them. Just follow the instructions all the way through to the rolling and cutting of the dough. Place them in the prepared pan, then cover it with plastic wrap tightly, and then with foil. If your pan has a lid, use that instead. Then freeze the entire thing!
To bake, just thaw the rolls overnight in the freezer and then let it come to room temperature the next day. Let it rise until the rolls are touching each other and the bake as directed!
Do I need to use artificial food coloring?
There are recipes out there that create red velvet cake and other red velvet baked goods using beets as the coloring. Beets, unfortunately wont work with this recipe. This recipe is specifically designed to use food coloring, as the grated beets not only will affect the flavor of this dough but will also lead to a heavy dough that wont rise properly.
The natural red food coloring dyes that I have tried all bake out and turn brown when heated in the oven. They seem to only work for non-baked items like frosting. So sadly the only way I have found to create the red color in this recipe is to use artificial red food coloring. If you find another option, please leave a comment! Id love to learn about it.
Of course, you can always leave out or reduce the red food coloring in this recipe as it is totally there for aesthetic reasons. The cinnamon rolls will look more like a chocolate cinnamon roll and still be delicious. But if you want a want the look of a red velvet cinnamon roll, I suggest using the red food coloring.
If you like these red velvet cinnamon rolls, check out some of my other cinnamon rolls:
- Sweet Potato Cinnamon Rolls with pecans
- Pistachio and Rosemary Cinnamon Rolls with Brown Sugar Cream Cheese Frosting
- Pumpkin Cinnamon Rolls with Easy Caramel Cream Cheese Frosting
- Quick and Easy Cinnamon Rolls (no yeast)
- Eggnog Cinnamon Rolls

Red Velvet Cinnamon Rolls
Ingredients
Dough
- 1 cup whole milk
- 1/2 cup plus 1 teaspoon white sugar
- 2 1/4 teaspoons active dry yeast 7 g or 1 package
- 6 tablespoons unsalted butter 85 g or 3/4 stick
- 1 teaspoon vanilla extract
- 1 tablespoons red food coloring
- 1 teaspoon kosher salt
- 2 large eggs
- 4 cups all-purpose flour
- 1/2 cup cocoa powder natural not Dutch-process 40 g
Cinnamon filling
- 1/2 cup unsalted butter 115 g or 1 stick
- 3/4 cup packed dark brown sugar 165 g
- 2 tablespoon ground cinnamon
- 1/2 teaspoon ground nutmeg
- 1/2 teaspoon kosher salt
Frosting
- 4 ounces cream cheese at room temperature, 115 g or 1/2 brick
- 4 tablespoon unsalted butter at room temperature, 57 g or 1/2 stick
- 1 teaspoon vanilla extract
- 1/4 teaspoon kosher salt
- 1 cup powdered sugar sifted 115 g
Instructions
-
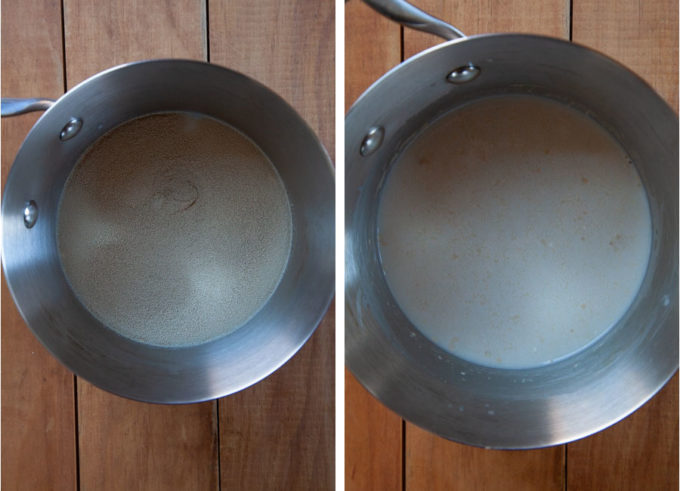
Make the dough by first heating up the milk up in a small saucepan until it is warm to the touch, about 90 to 100F. This should only take about 15 seconds on a hot stove. Sprinkle 1 teaspoon of white sugar in it, then stir the yeast into the milk with a fork until it dissolves. Set aside for 5 to 10 minutes until you start to see some bubbles form on the top of the milk.
-
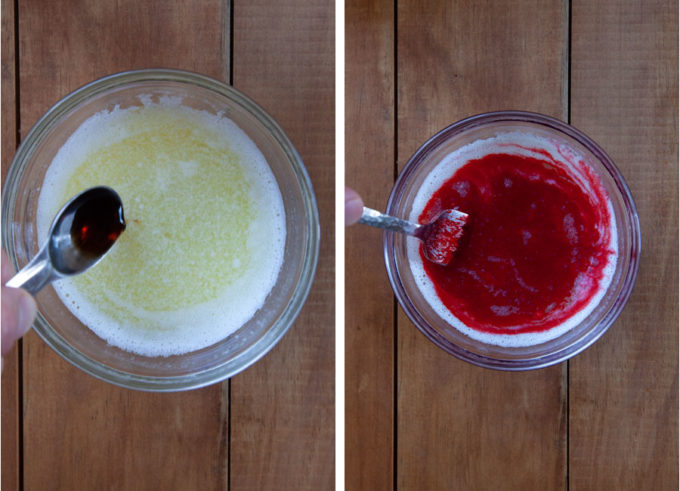
Meanwhile melt the butter by placing it in a medium sized microwave safe bowl and cooking it in the microwave for 30 to 45 seconds. Stir in the vanilla and the red food coloring to the melted butter.
-
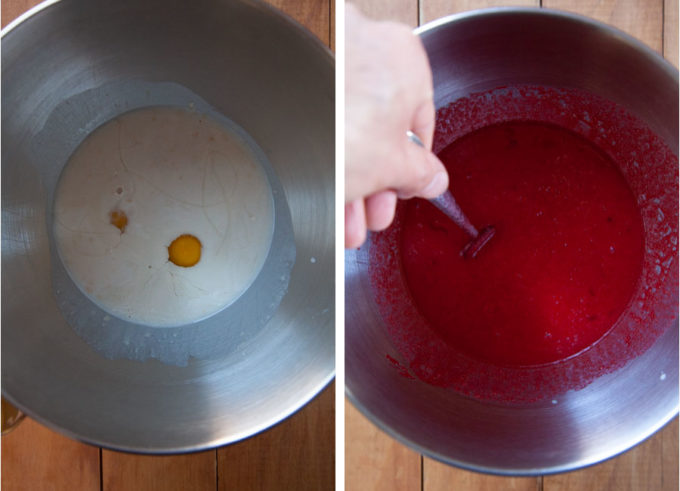
Pour the milk into the bowl of a stand mixer fitted with a dough hook attachment. Add the red butter, the eggs, remaining sugar, and kosher salt and beat together with a fork.
-
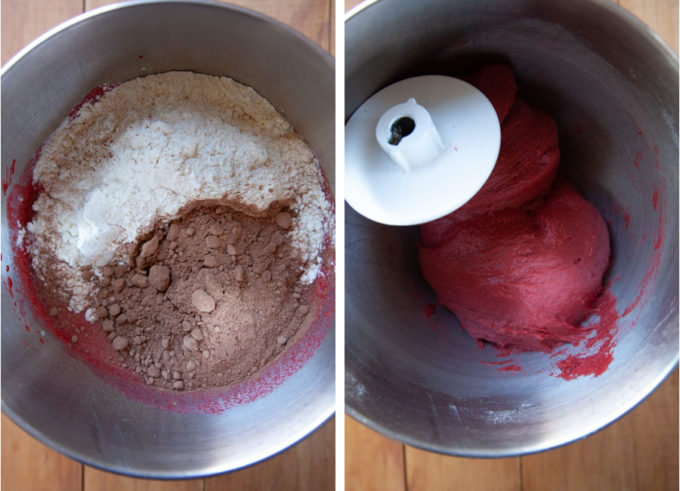
Add the flour and cocoa to the bowl. Mix with the dough hook on slow speed until most of the flour has been absorbed. You may need to stop the mixer occasionally and scrape down the sides or bottom of the bowl to mix in any dry ingredients that havent incorporated. Once a dough has formed, increase the speed to medium and knead the dough for 4 to 5 minutes or until a smooth elastic dough has formed.
-
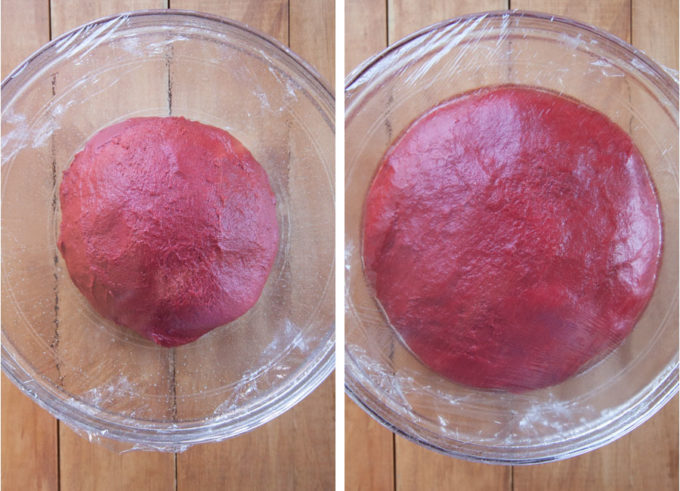
Spray a large bowl, at least twice the size of the dough, with cooking oil. Pull the dough out of the mixing bowl (it will be very soft and slightly sticky) and stretch the dough as much as you can to form a ball. Place the dough in the greased bowl, with the rough side down. Cover with plastic wrap. At this point you can either refrigerate the dough overnight or place it in a warm spot in your kitchen to let rise until double in size, about 60 to 90 minutes. See my section above about creating the optimum environment for this process.
-
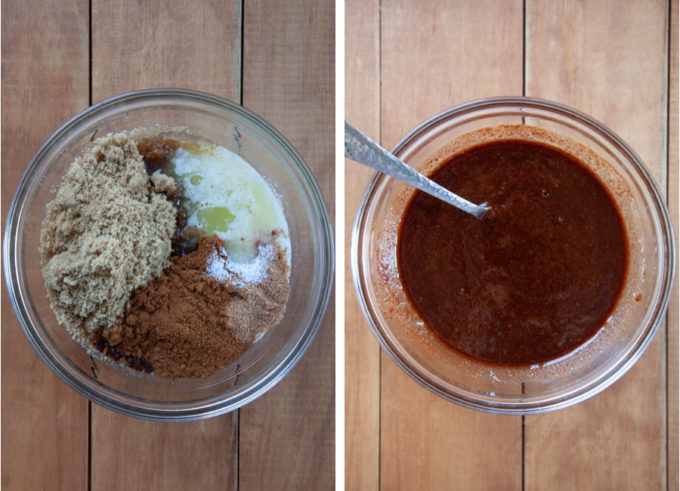
While the dough is rising, make the filling by placing the butter in a medium sized microwave safe bowl. Cook the butter for 30 to 45 seconds in the microwave, or until it is melted. Add the brown sugar, cinnamon, nutmeg and salt and stir until blended and uniform in color. Set aside to cool.
-
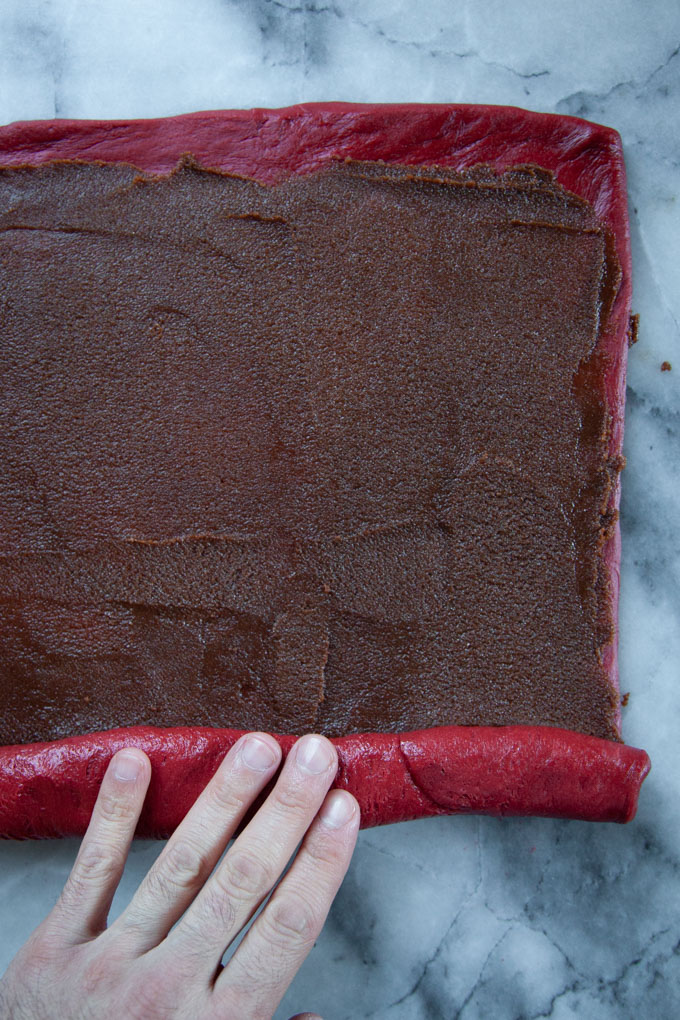
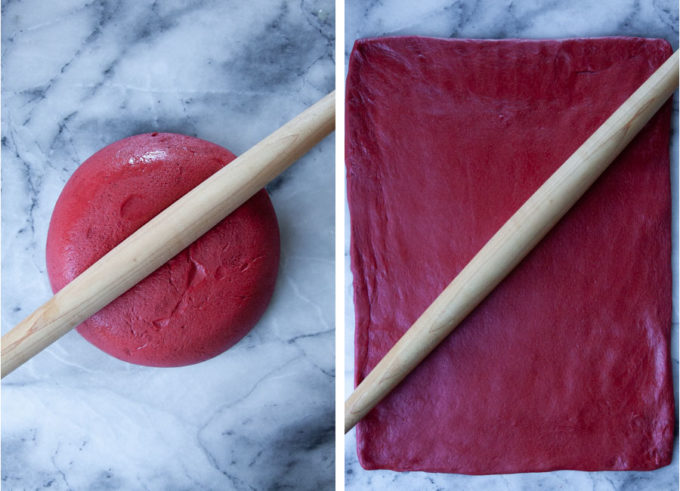
Once the dough has risen, dump it out on to a clean smooth surface. Dont flour it. You want the dough to stick slightly to the surface, this will help it roll out. Roll the dough into an 18 x 12-inch rectangle.
-
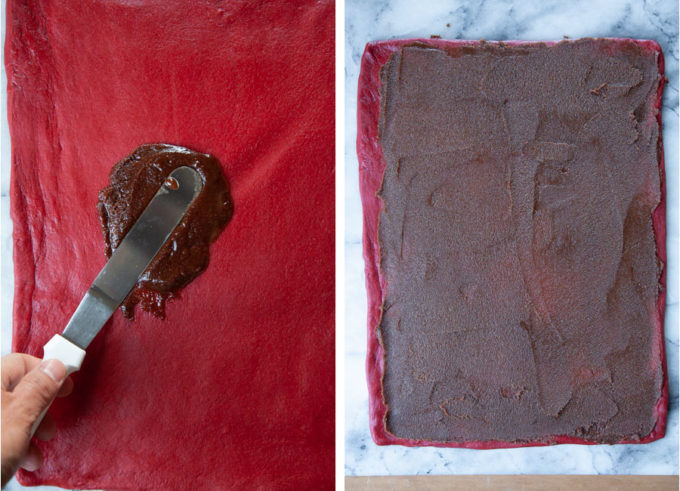
Spread the cinnamon filling evenly all over the dough, leaving a 1/2-inch bare area at the top of the dough on the long side.
-
Roll the dough up tightly from the bottom to the uncovered top area, forming an 18-inch log. Cut the dough into 12 individual 1 1/2-inch pieces.

-
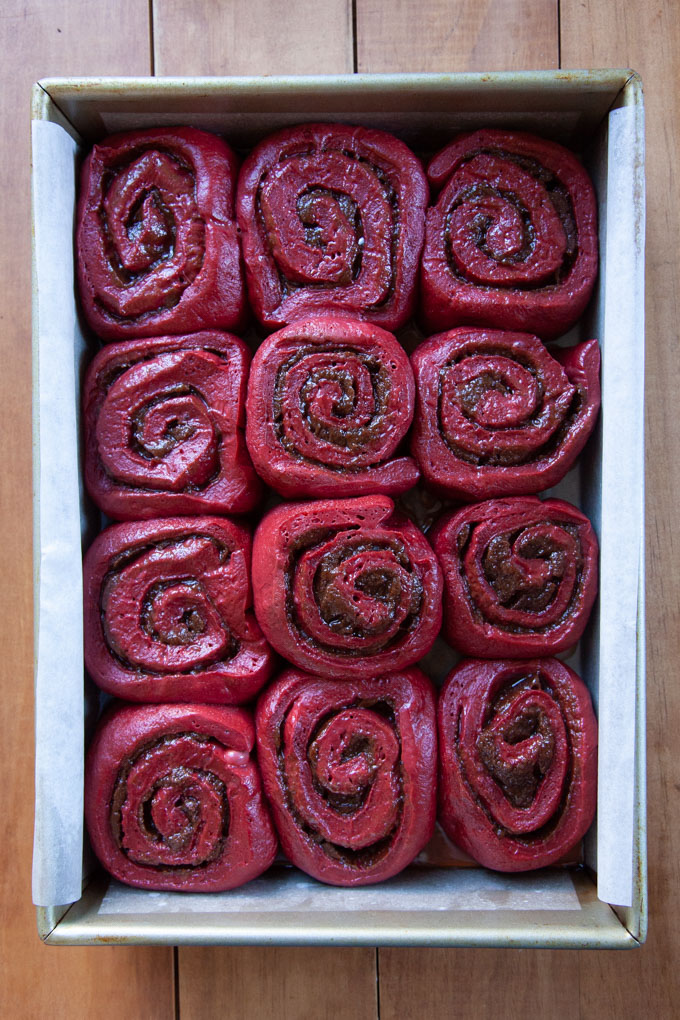
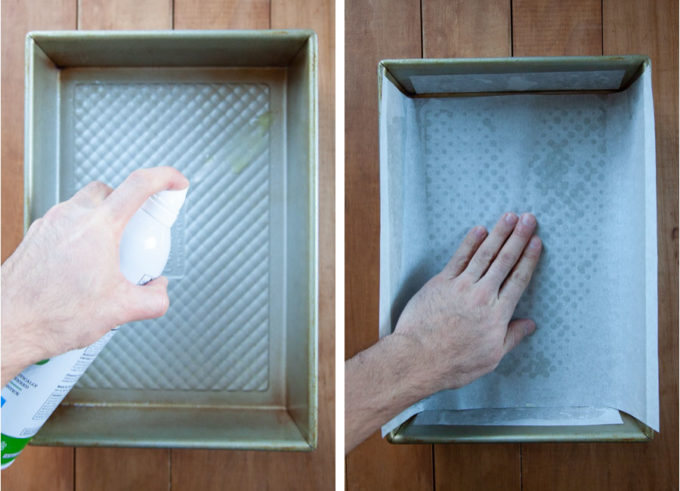
Spray a 9 x 13 inch baking pan with cooking oil, then line the inside of the pan with parchment paper leaving 1-inch overhang on the sides.
-
Place the cinnamon rolls, swirl side up, in the baking pan in a 4 x 3 inch grid. Cover with plastic wrap. At this point you can either refrigerate the dough overnight or place it in a warm spot in your kitchen to let rise until puffy and touching each other, about 45 to 60 minutes. See my section above about creating the optimum environment for this process.
-
Once the rolls are puffy and touching, preheat the oven to 350F. Bake in the oven for 27 to 30 minutes or until the top of the rolls start to brown and look puffy and dry. If you have an instant read thermometer, the middle roll should read somewhere around 185 to 190F.
-
While the rolls are baking, make the frosting. Place cream cheese, butter, vanilla, and salt in the bowl of a stand mixer fitted with a paddle attachment. Sift the powdered sugar into the bowl (don't skip this step, as powdered sugar has a tendency to clump and this makes your frosting lumpy). Mix together until fluffy and creamy, about 2 to 3 minutes.
-
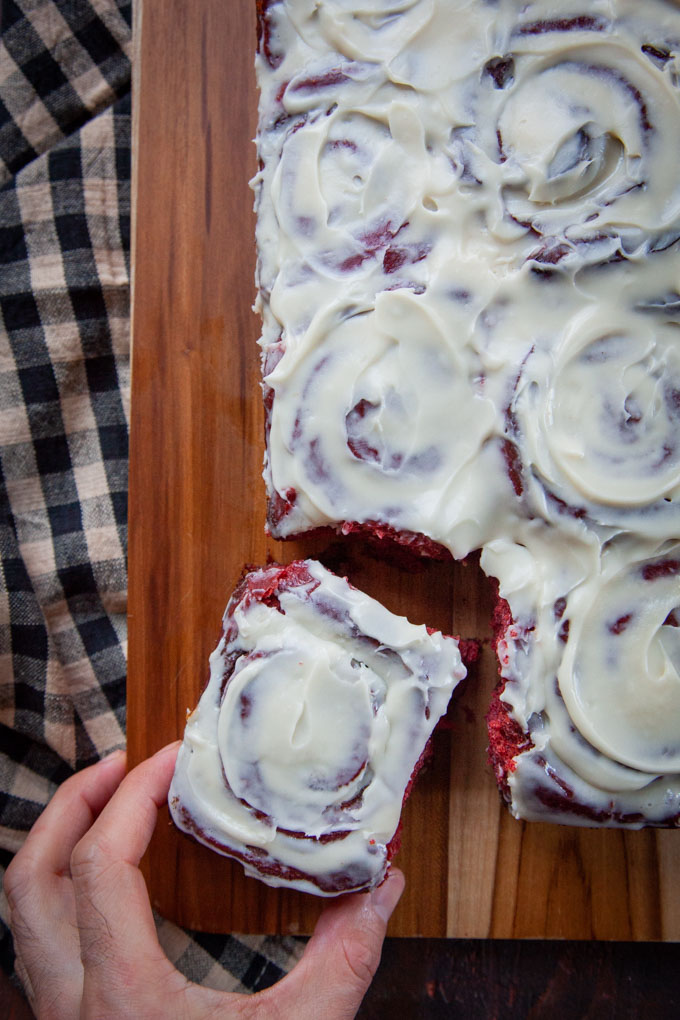
Once the rolls are done, remove from the oven and spread half the frosting over the hot rolls. The frosting should turn into a liquidy glaze and coat all the crevices of the rolls. This will ensure the rolls stay moist as they cool. Let the rolls cool down further, about 30 to 45 minutes, then spread the remaining frosting over the rolls.

The post Red Velvet Cinnamon Rolls appeared first on Eat The Love.